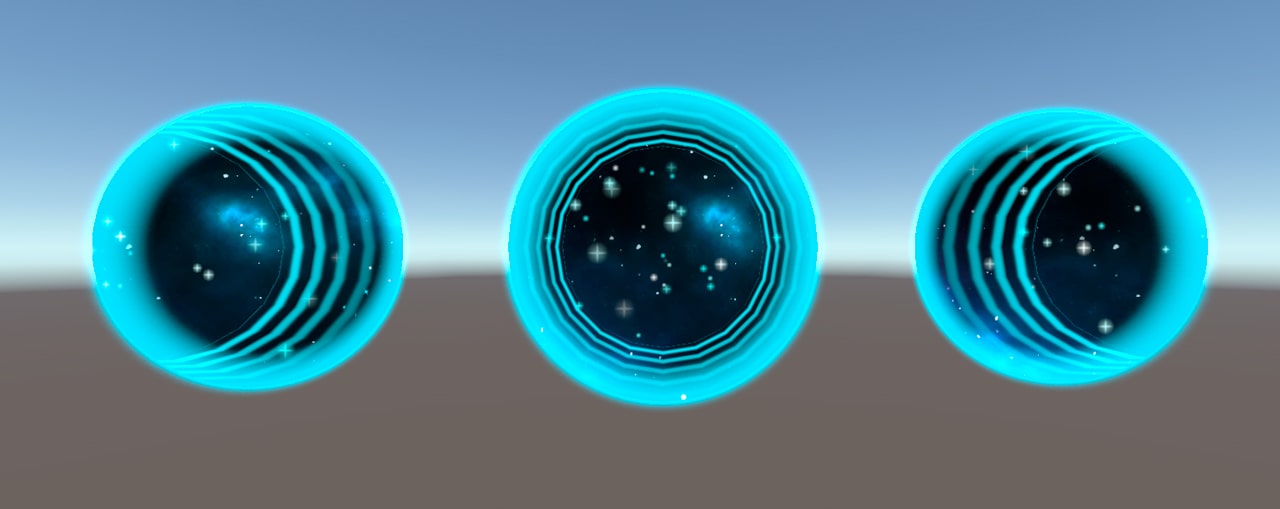
Discover the secrets of the universe and unleash your creativity with our tutorial on how to create an amazing space portal in Unity using HLSL! Immerse yourself in a captivating cosmic journey as you delve into the mysteries of shader programming and build a portal that will transport you to remote and unknown places. Dare to explore the depths of outer space and master the power of High-Level Shading Language to bring stunning visual effects to life.
Project Structure
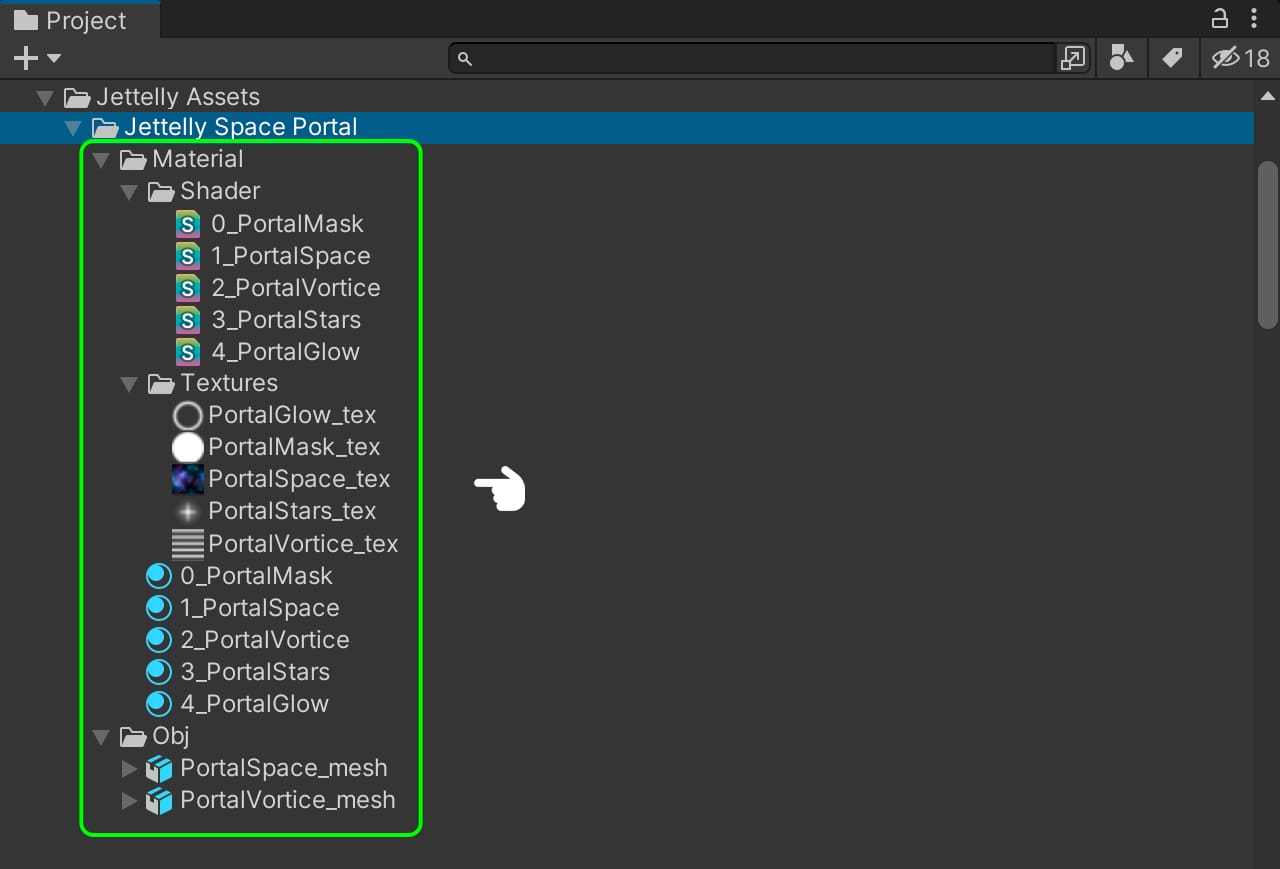
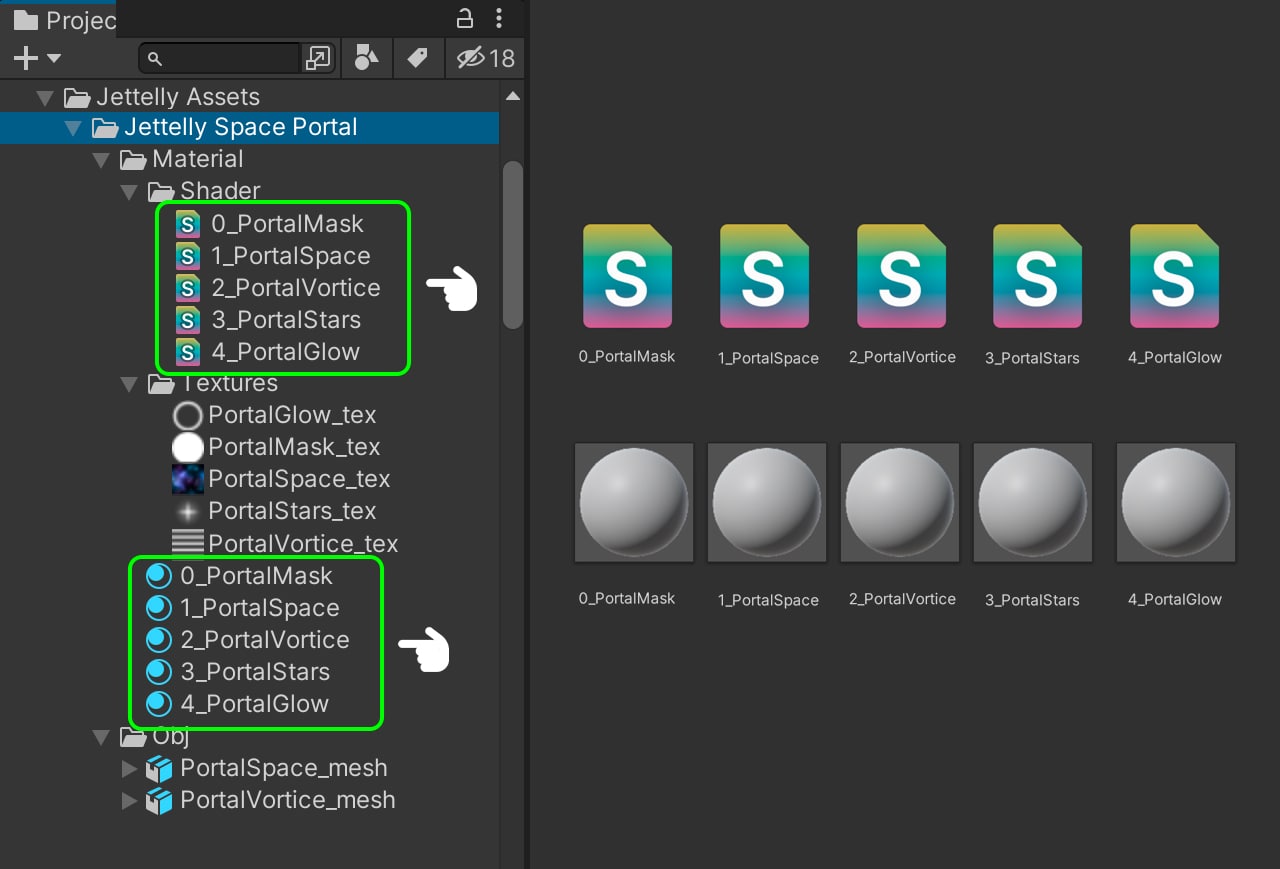
To organize our project, we are going to create a main folder called ‘Jettelly Space Portal.’ Inside this folder, you can see all the subfolders used in the project (see image). The structure of the subfolders can be organized according to your preferences, but it is important to maintain order in any project.
3D Mesh & Textures
The textures that we are going to use were created in Photoshop.
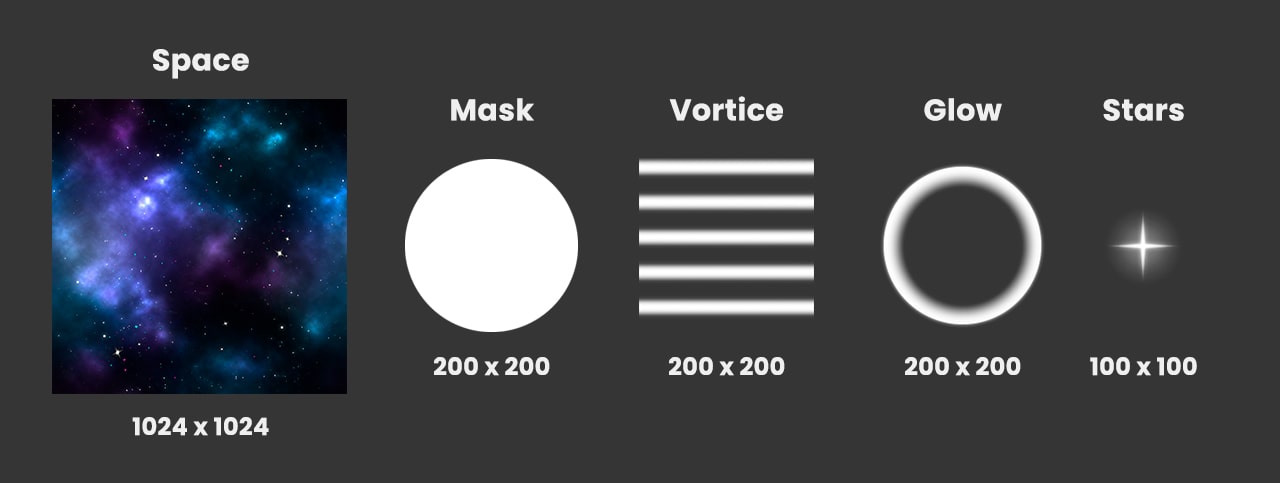
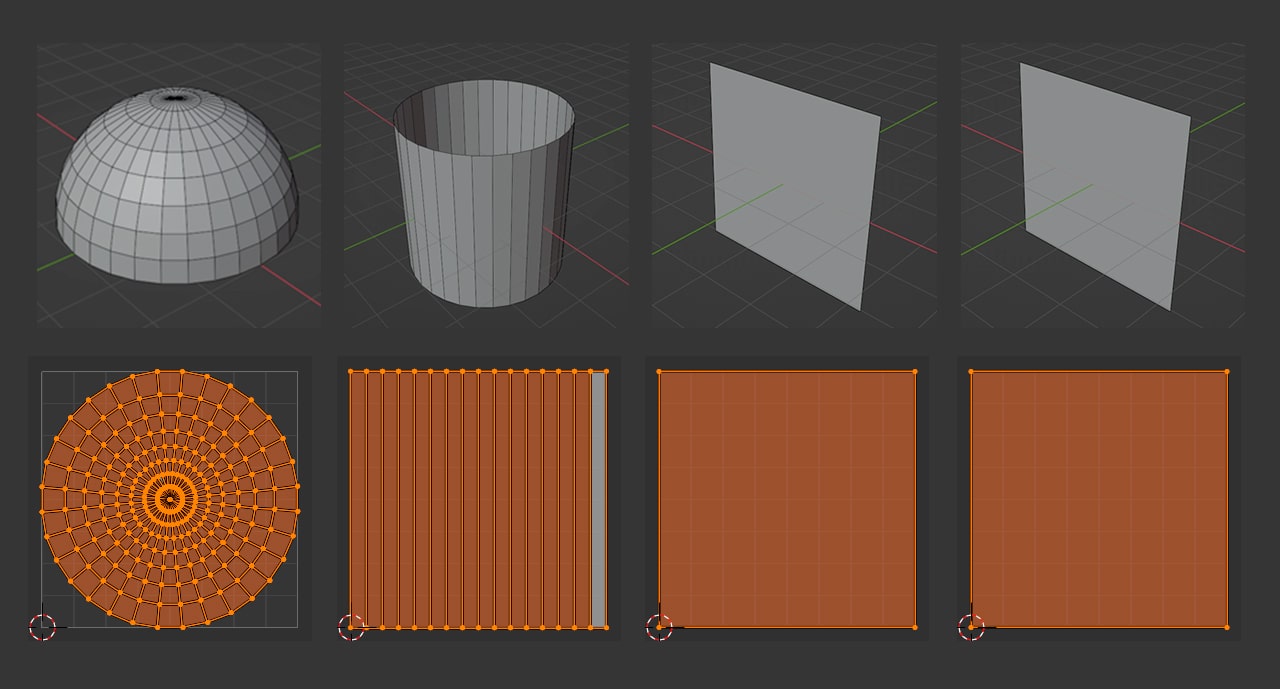
To develop this effect we must create in the preferred 3D software: a hemisphere of a circle for space, a cylinder for the vortex. In addition a quad for the mask of our portal, another quad for the glow effect. (We will create the Quads in Unity)
Shader & Material setting
The first step in our process is to create five Materials (Create > Material). We will name them as follows: 0_PortalMask, 1_PortalSpace, 2_PortalVortice, 3_PortalStars, and 4_PortalGlow. It’s important to list these materials because we will be disabling the z-buffer, and the index will indicate their position in the render queue. Next, we will create five Unlit Shaders (Create > Shader > Unlit Shader), naming them accordingly.
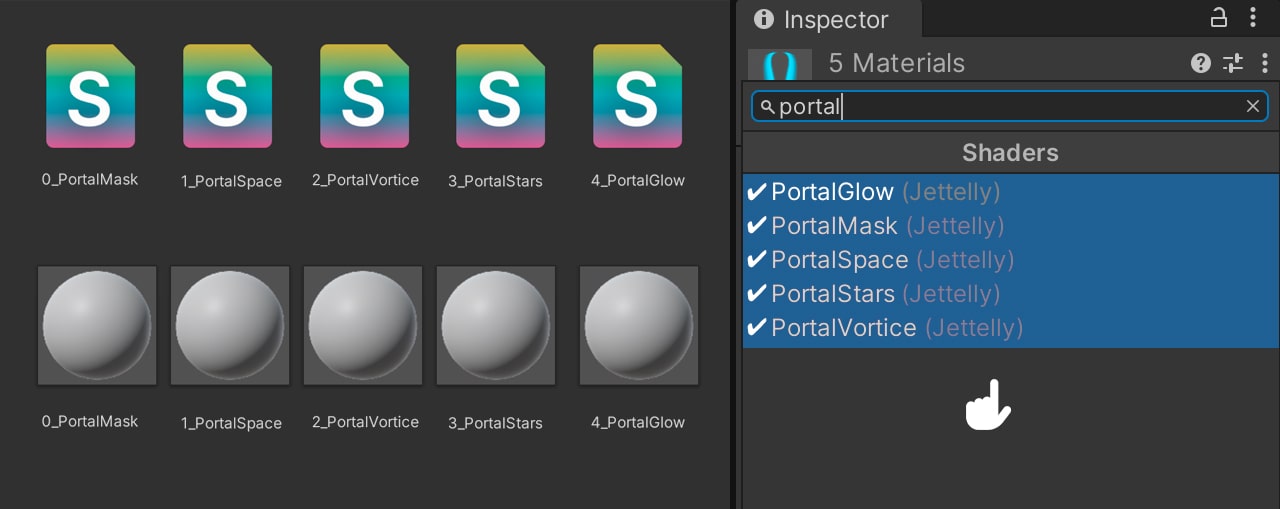
Next, we proceed to assign the shaders to the materials. To do this, we select a material and choose the corresponding shader from the Material Inspector. We repeat this step for all five materials.
Creating the mask
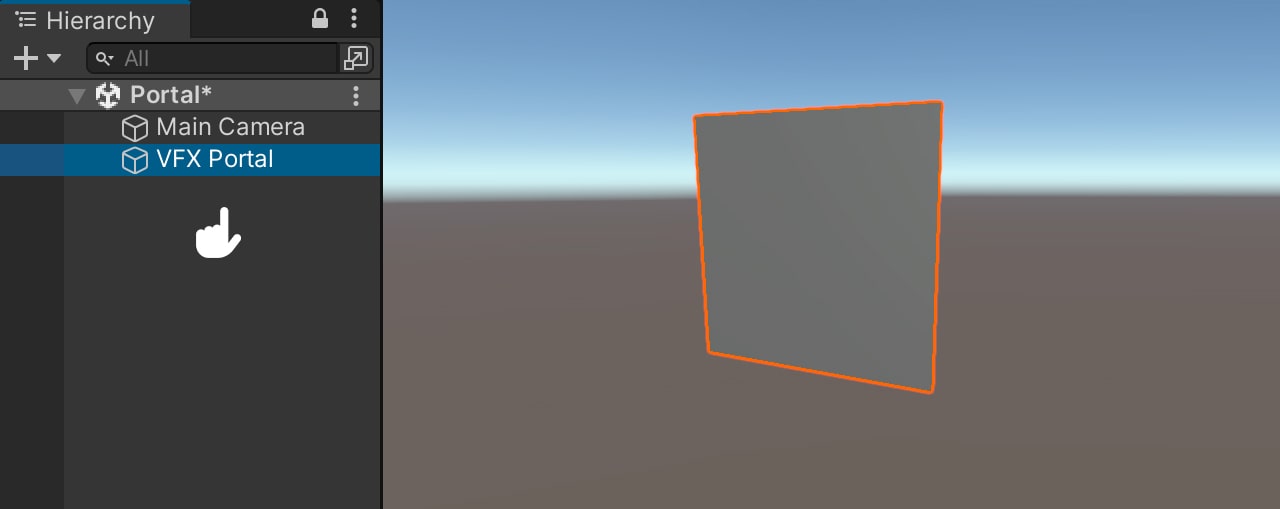
We navigate to our hierarchy and create a Quad, naming it ‘VFX Portal’ and scaling it uniformly to a diameter of 2 meters. Then, we proceed to assign our ‘0_PortalMask’ material.
Next, we open our ‘0_PortalMask’ shader, and the first step is to replace all occurrences of ‘_MainTex’ with ‘_Mask’ (Right Click > Change All Occurrences). This modification is necessary as the shader will solely utilize an alpha mask for our portal effect.
Shader "Unlit/0_PortalMask"
{
    Properties
    {
        _Mask ("Texture", 2D) = "white" {} // <----------------
    }
    SubShader
    {
        Tags { "RenderType"="Opaque" }
        LOD 100

        Pass
        {
            CGPROGRAM
            #pragma vertex vert
            #pragma fragment frag
            // make fog work
            #pragma multi_compile_fog

            #include "UnityCG.cginc"

            struct appdata
            {
                float4 vertex : POSITION;
                float2 uv : TEXCOORD0;
            };

            struct v2f
            {
                float2 uv : TEXCOORD0;
                UNITY_FOG_COORDS(1)
                float4 vertex : SV_POSITION;
            };

            sampler2D _Mask;
            float4 _Mask_ST; // <----------------

            v2f vert (appdata v)
            {
                v2f o;
                o.vertex = UnityObjectToClipPos(v.vertex);
                o.uv = TRANSFORM_TEX(v.uv, _Mask); // <----------------
                UNITY_TRANSFER_FOG(o,o.vertex);
                return o;
            }

            fixed4 frag (v2f i) : SV_Target
            {
                // sample the texture
                fixed4 col = tex2D(_Mask, i.uv); // <----------------
                // apply fog
                UNITY_APPLY_FOG(i.fogCoord, col);
                return col;
            }
            ENDCG
        }
    }
}
As we are aware, the ‘PortalMask’ has an index of 0. Therefore, we add the tag “Queue”=”Transparent” and activate alpha blending, utilizing the blend mode ‘Blend SrcAlpha OneMinusScrAlpha.’
 SubShader
    {
        Tags { "RenderType"="Opaque" "Queue"="Transparent" } // <----------------
        Blend SrcAlpha OneMinusSrcAlpha // <----------------
        LOD 100
To ensure our mask appears black, we navigate to the fragment shader and return a float4 variable with RGB values set to 0 and the alpha value equal to the mask. After saving our changes, we return to Unity.
            fixed4 frag (v2f i) : SV_Target
            {
                // sample the texture
                fixed4 col = tex2D(_Mask, i.uv);
                // apply fog
                UNITY_APPLY_FOG(i.fogCoord, col);
                return float4(0, 0, 0, col.a); // <----------------
            }
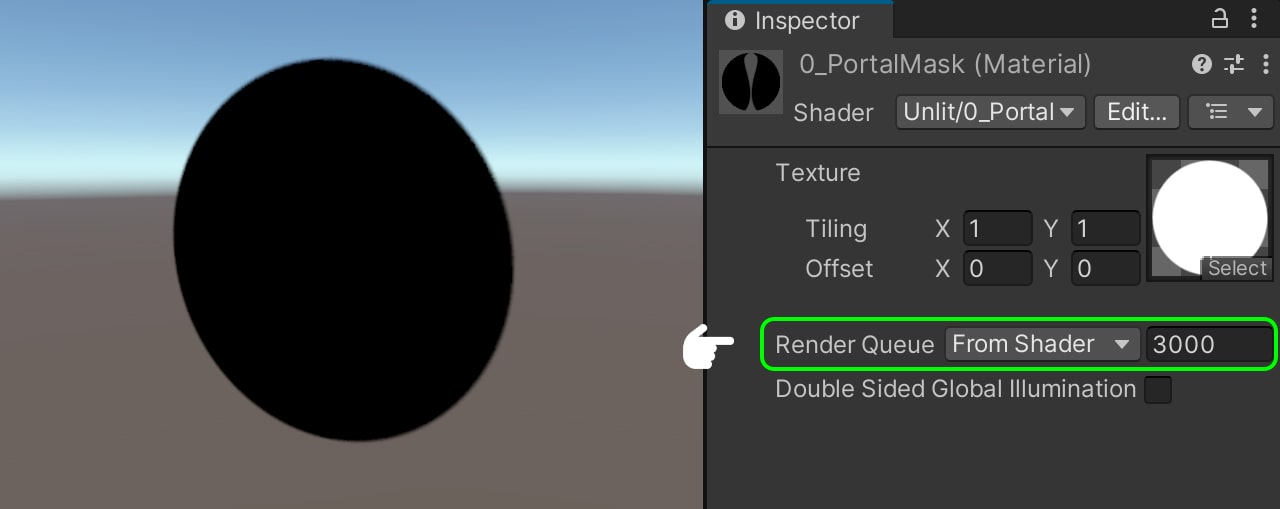
For the texture, we use ‘PortalMask_tex.’ As we can see, our mask has been perfectly added and also the Render Queue on the material to 3000.
Creating the vortice
Now, our next step is to add our ‘PortalVortice_mesh’ to the hierarchy and drag it into the ‘VFX Portal.’ In the scene, we position it alongside our mask on the positive Z-axis. As we observe, both figures fit perfectly due to their matching diameter of 2 meters.
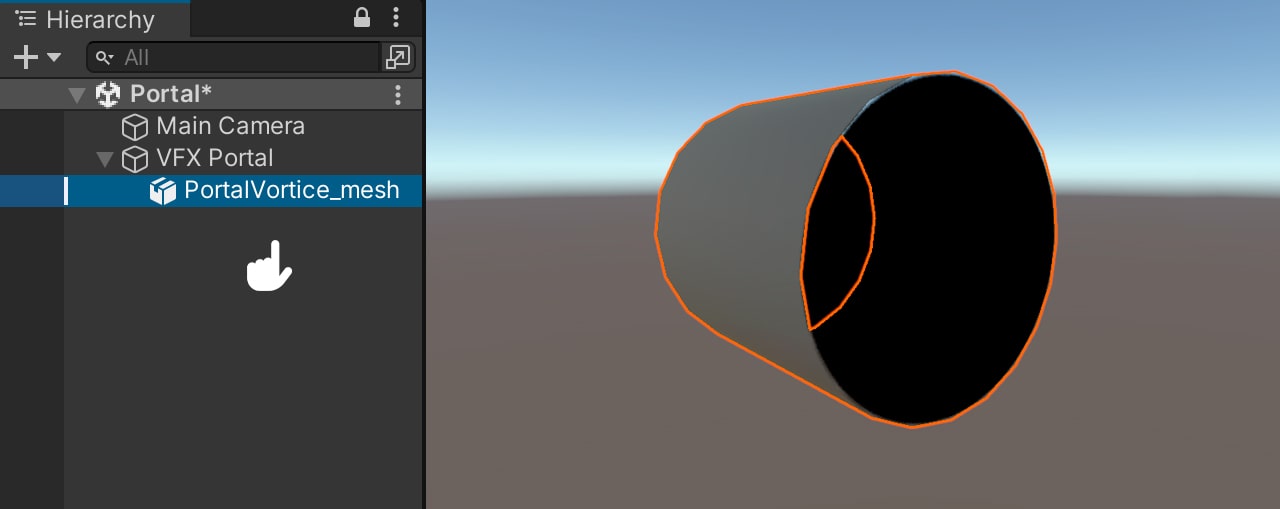
Moving on, we open our ‘2_PortalVortice’ shader. Since we know that the index assigned to the vortex portal is 2, we add “Queue” = “Transparent +2” to ensure that our vortex is rendered above the mask. However, for the process to function seamlessly, we must incorporate depth testing by including the ZTest Greater function. We proceed with Blend SrcAlpha One to create an additive shader effect, and Cull Front to display only the front face of our vortex. After saving our changes, we return to Unity.
    SubShader
    {
        Tags { "RenderType"="Opaque" "Queue"="Transparent+2" } // <----------------
        ZTest Greater // <----------------
        Blend SrcAlpha One // <----------------
        Cull Front // <----------------
        LOD 100
Next, we assign our material to the mesh and use ‘PortalVortice_tex’ as the texture. As we can see, our vortex is now properly rendered over the mask.
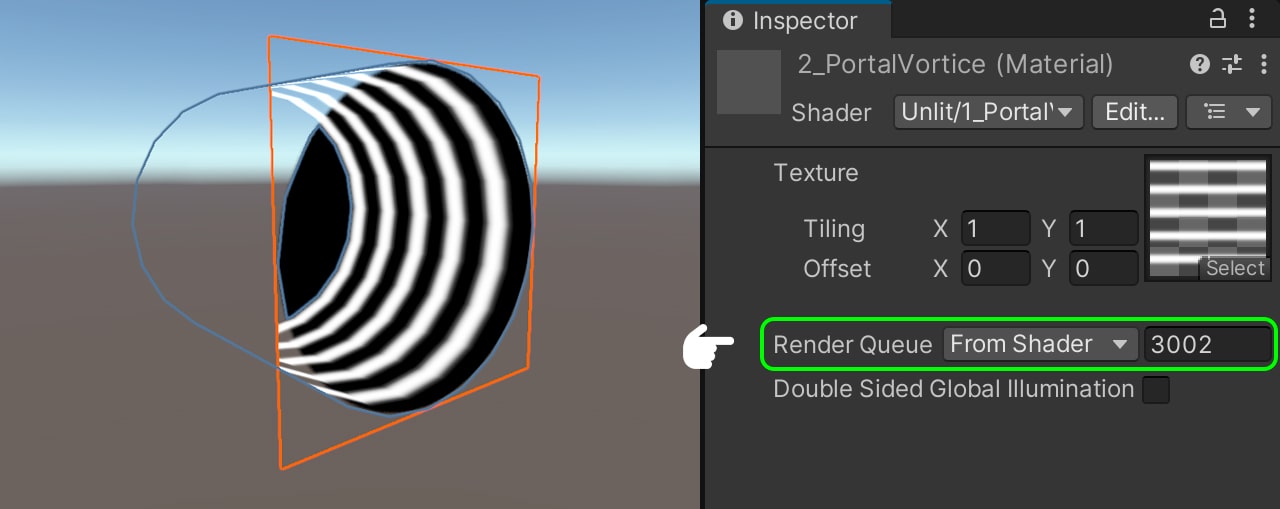
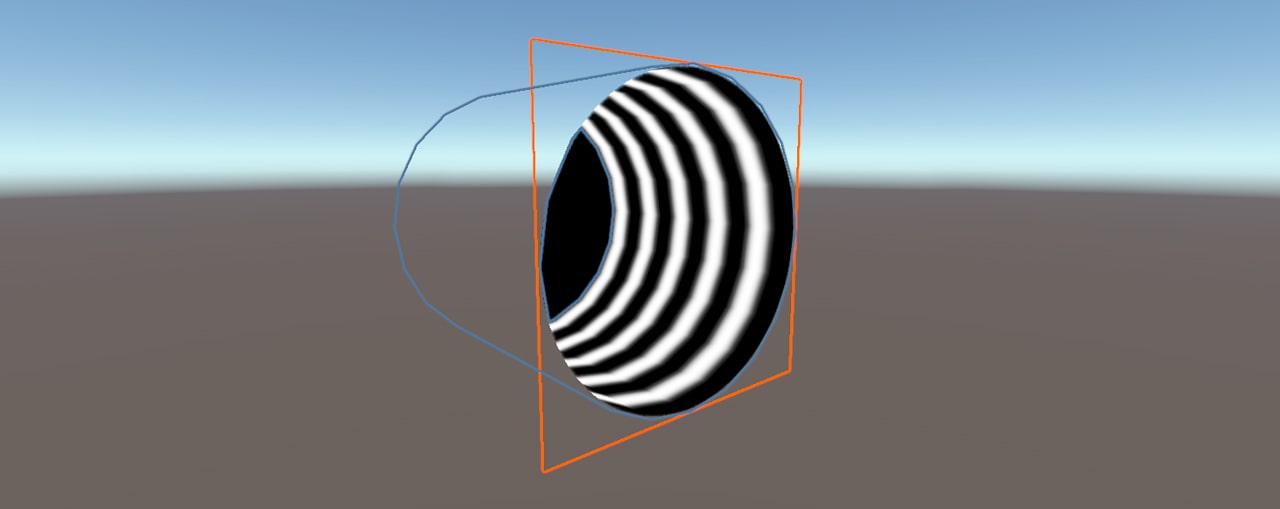
Why is this happening? It’s because we have implemented the ZTest Greater function, which enables us to render an object in front of, behind, or at a specific distance from another object. Additionally, by increasing the value in the Render Queue by adding +2 in the shader, we ensure that our vortex is rendered last on the GPU. However, currently, the vortex extends beyond the boundaries of the Quad and covers the entire area instead of being confined to the mask.
To rectify this issue, we revisit our ‘0_PortalMask’ shader and activate the AlphaToMask On function. After saving our changes, we return to Unity.
    SubShader
    {
        Tags { "RenderType"="Opaque" "Queue"="Transparent" }
        Blend SrcAlpha OneMinusSrcAlpha
        AlphaToMask On // <----------------
        LOD 100
Now, our vortex is precisely drawn only over the mask area.
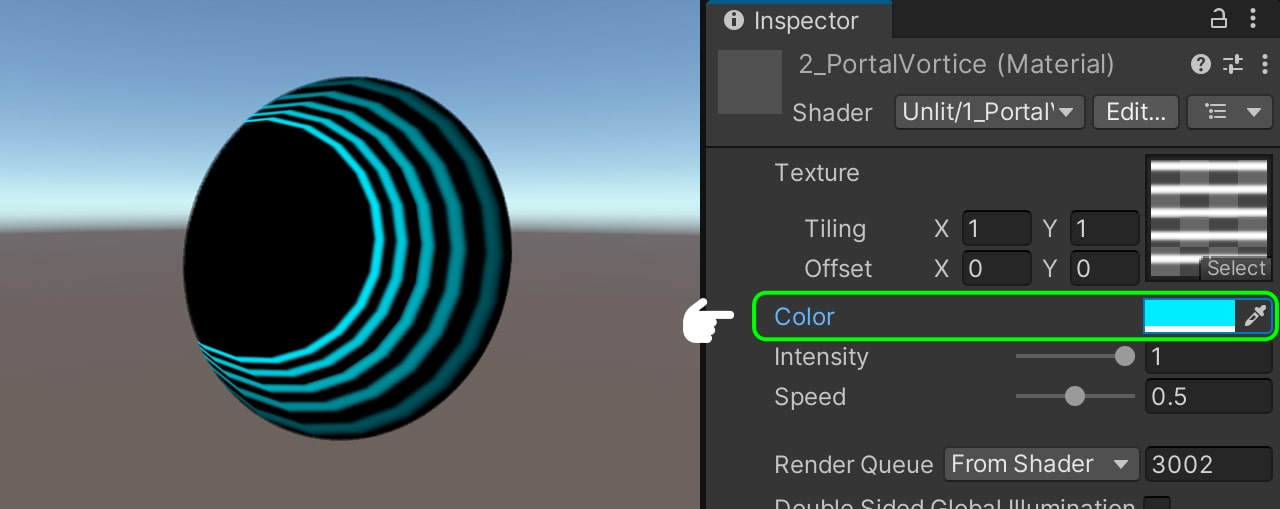
We return to our ‘2_PortalVortice’ shader and add three properties. The first one, ‘_Color,’ is named ‘Color’ and defaults to white. Then we add ‘_Intensity,’ named ‘Intensity,’ which ranges from 0 to 1. Finally, we add ‘_Speed,’ named ‘Speed,’ also ranging from 0 to 1. We establish the corresponding connection variables.
    Properties
    {
        _MainTex ("Texture", 2D) = "white" {}
        _Color ("Color", Color) = (1, 1, 1, 1) // <----------------
        _Intensity ("Intensity", Range(0, 1)) = 1 // <----------------
        _Speed ("Speed", Range(0, 1)) = 0.5 // <----------------
    }
sampler2D _MainTex;
float4 _MainTex_ST;
float4 _Color; // <----------------
float _Intensity; // <----------------
float _Speed; // <----------------Next, we navigate to our fragment shader and introduce the following lines of code:
            fixed4 frag (v2f i) : SV_Target
            {
                // sample the texture
                fixed2 uvs = fixed2 (i.uv.x, i.uv.y + (_Time.y * _Speed)); // <----------------
                fixed4 col = tex2D(_MainTex, uvs); // <----------------
                // apply fog
                UNITY_APPLY_FOG(i.fogCoord, col);
                return fixed4 (col.rgb * _Color.rgb, col.a * i.uv.y * _Intensity); // <----------------
            }
In the uvs variable, we pass the uvs input as an argument, with the addition of (_Time.y * _Speed) in the Y coordinate to dynamically control the offset animation from the inspector.
We pass the uvs variable as the second argument in our tex2D function to display the offset.
Lastly, we return a fixed4 variable where the RGB values are derived from the color of the texture multiplied by the RGB values of the ‘_Color’ property. This enables dynamic color changes for our texture. As for the alpha value, we multiply it by the gradient alpha of the uvs input in its V coordinate and further multiply it by the ‘_Intensity’ property to modify the alpha value from the inspector. After saving our changes, we return to Unity.
Upon inspecting our ‘2_PortalVortice’ material, we’ll notice that our properties have been successfully added. When we press Play, our vortex will animate accordingly.
Creating the space
Now, let’s navigate to our project and drag the ‘PortalSpace_mesh’ into our ‘VFX portal.’ We rotate the mesh by 90 degrees and ensure that it is positioned behind our mask.
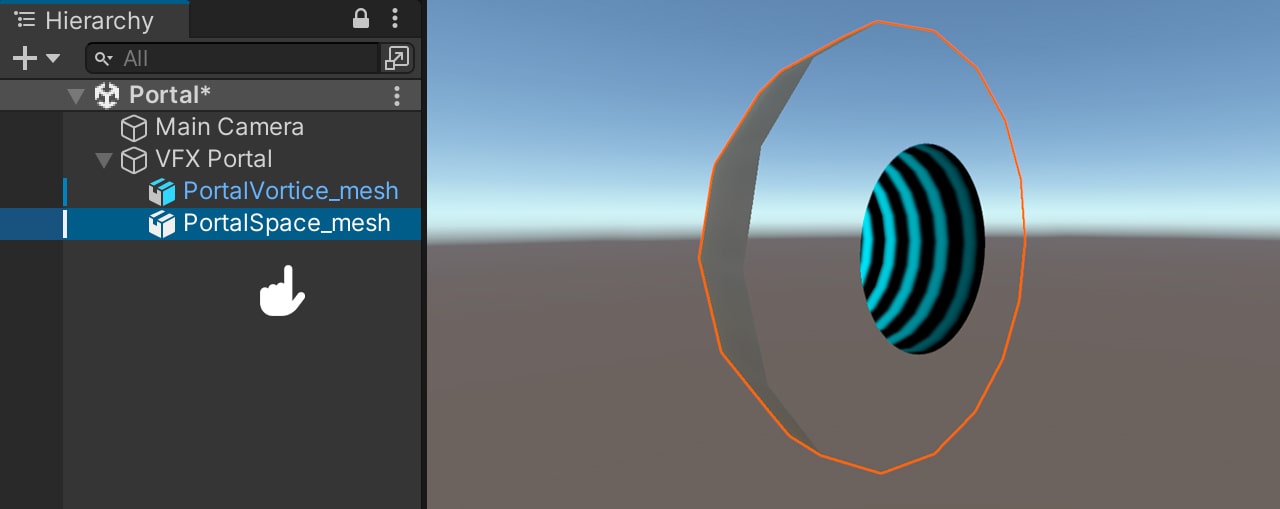
Next, we open our ‘1_PortalSpace’ shader. As a reminder, the index assigned to the portal space is 1. Thus, we add “Queue”=”Transparent + 1”. To make the mask function correctly, we deactivate the z-buffer by including ZWrite Off. Additionally, we implement ZTest Greater for proper blending, using Blend SrcAlpha OneMinusSrcAlpha for a normal alpha blend. Lastly, we render only the front face of our hemisphere by enabling Cull Front. After saving our changes, we return to Unity.
    SubShader
    {
        Tags { "RenderType"="Opaque" "Queue"="Transparent+1" } // <----------------
        ZWrite Off // <----------------
        ZTest Greater // <----------------
        Blend SrcAlpha OneMinusSrcAlpha // <----------------
        Cull Front // <----------------
        LOD 100
We assign the material to our ‘PortalSpace_mesh’ and use ‘PortalSpace_tex’ as the texture. As observed, our hemisphere has been seamlessly masked.
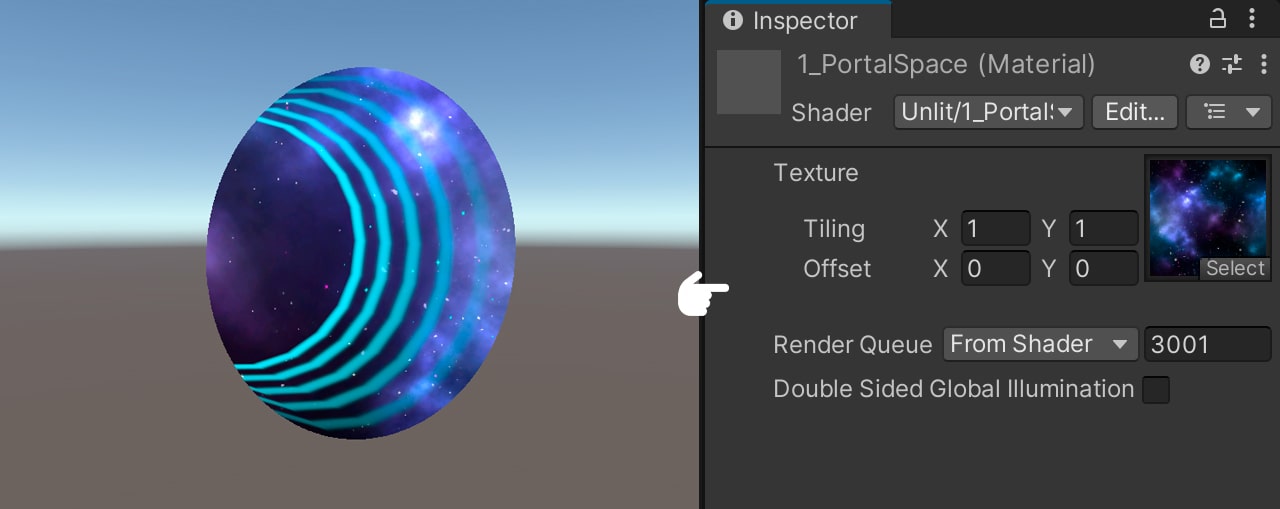
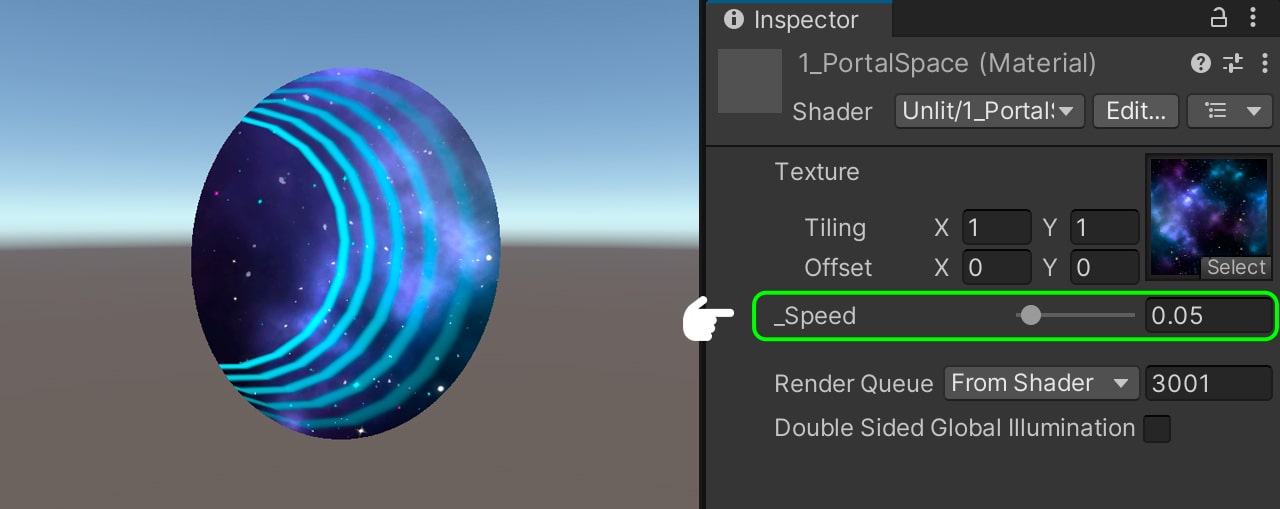
Returning to our shader, we add the ‘_Speed’ property, naming it ‘Speed,’ which should range from 0 to 1. We establish the corresponding connection variable.
    Properties
    {
        _MainTex ("Texture", 2D) = "white" {}
        _Speed ("_Speed", Range(0, 1)) = 0.5 // <----------------
    }
sampler2D _MainTex;
float4 _MainTex_ST;
float _Speed; // <----------------Finally, in our Fragment Shader, we modify the uvs coordinates to include (_Time.y * _Speed). After saving our changes, we return to Unity.
            fixed4 frag (v2f i) : SV_Target
            {
                // sample the texture
                fixed4 col = tex2D(_MainTex, i.uv + (_Time.y * _Speed)); // <----------------
                // apply fog
                UNITY_APPLY_FOG(i.fogCoord, col);
                return col;
            }
Now, our texture animates in both its U and V coordinates. We only need to create our glow layer and the particle system for the stars.
Creating the stars
Next, in our hierarchy, we create a Particle System. We select the ‘3_PortalStars’ material and as texture we pass the ‘3_PortalStars_tex’ texture.
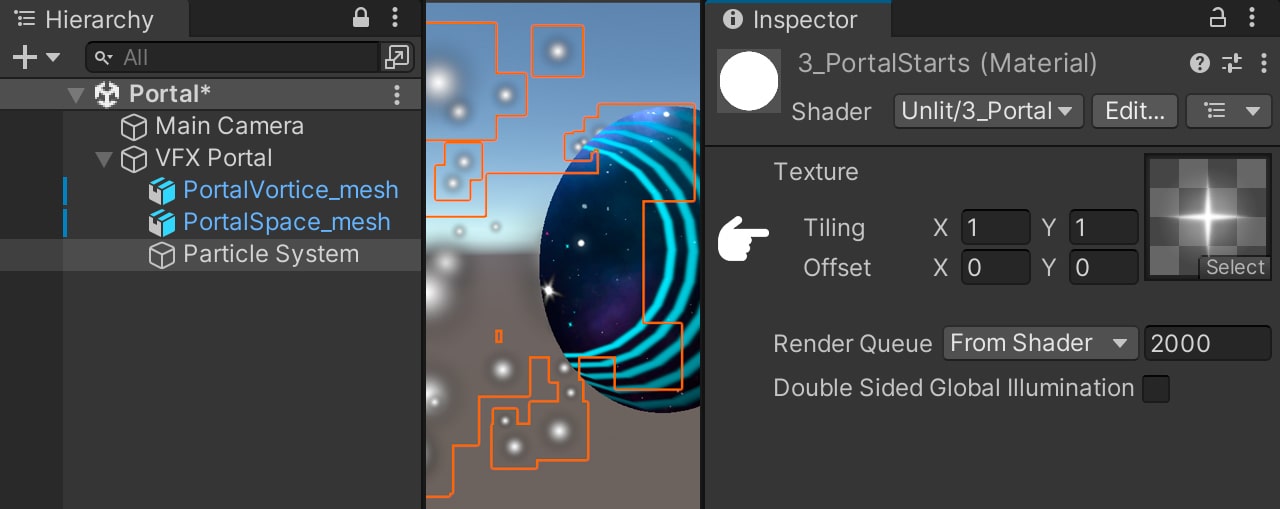
We open our ‘3_PortalStars’ shader and include “Queue”=”Transparent + 3”. To deactivate the z-buffer, we add ZWrite Off, and to ensure the mask functions correctly, we add ZTest Greater. For additive blending, we use Blend SrcAlpha One. After saving our changes, we return to Unity.
    SubShader
    {
        Tags { "RenderType"="Opaque" "Queue"="Transparent+3" } // <----------------
        ZWrite Off // <----------------
        ZTest Greater // <----------------
        Blend SrcAlpha One // <----------------
        LOD 100
In the Shape module, we set the Angle to 0, and in the Renderer module, we assign the previously created ‘3_PortalStars’ material. Upon emitting particles, we may notice a graphical error between the particles and the vortex. This occurs because we have not disabled the z-buffer in the vortex shader.
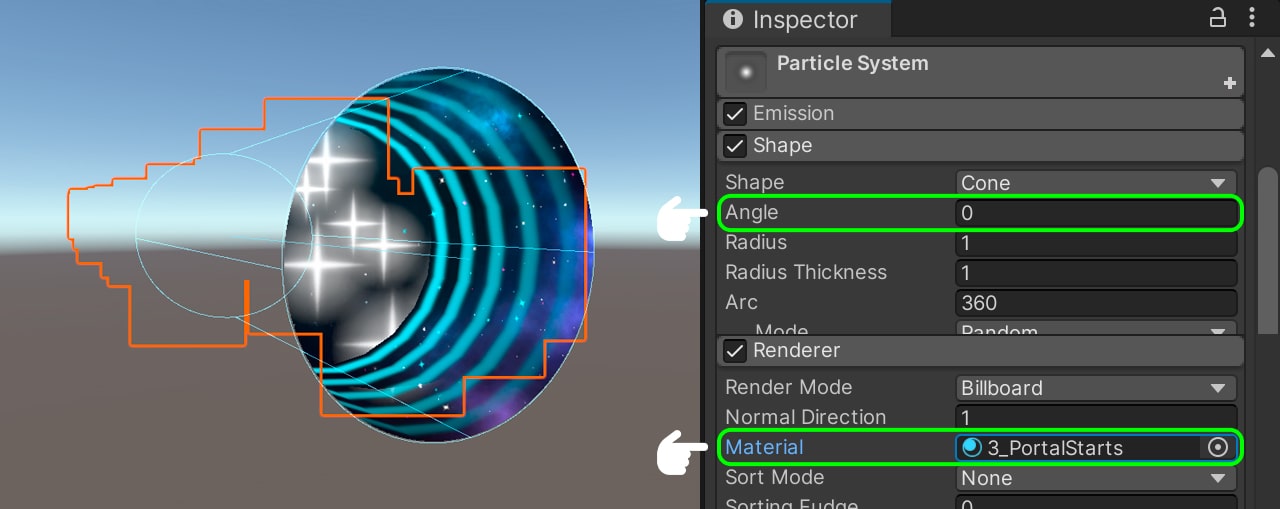
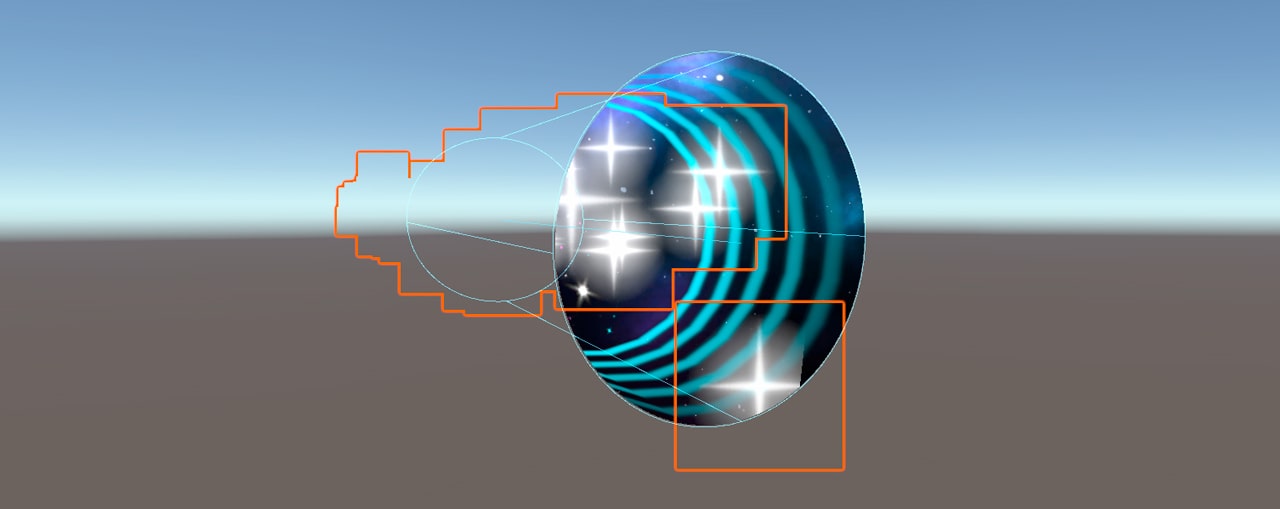
To resolve this, we navigate to the ‘2_PortalVortice’ shader and disable the z-buffer by adding ZWrite Off. After saving our changes, we return to Unity.
    SubShader
    {
        Tags { "RenderType"="Opaque" "Queue"="Transparent+2" }
        ZWrite Off // <----------------
        ZTest Greater
        Blend SrcAlpha One
        Cull Front
        LOD 100
Upon pressing Play, we will observe that the stars now appear on the vortex. The layers function perfectly.
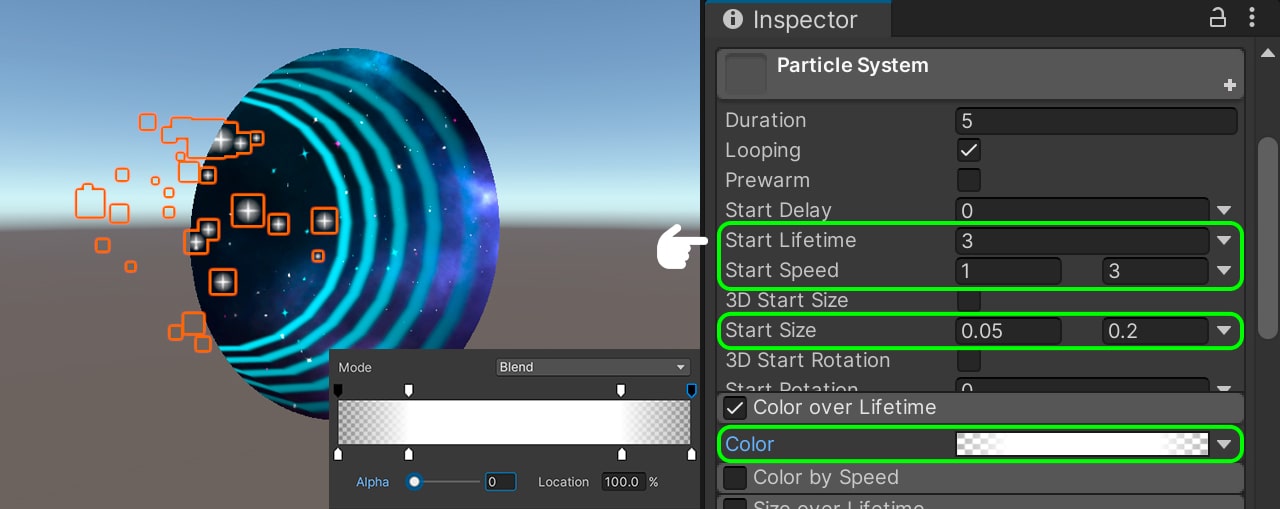
Moving on, we set the Start Lifetime to 3 seconds, the Start Speed between 1 and 3 meters per second, and the Start Size between 0.05 and 0.2. We also add the Color over Lifetime module. However, if we attempt to change the color, we’ll notice that it’s not possible. This is because we haven’t configured the color input within the shader.
To address this, we go to the ‘3_PortalStars’ shader and pass the color input and output in the Structs.
            struct appdata
            {
                float4 vertex : POSITION;
                float2 uv : TEXCOORD0;
                float4 color : COLOR; // <----------------
            };

            struct v2f
            {
                float2 uv : TEXCOORD0;
                UNITY_FOG_COORDS(1)
                float4 vertex : SV_POSITION;
                float4 color : COLOR; // <----------------
            };
We connect the color in the Vertex Shader, and finally, we multiply our texture by the color input. After saving our changes, we return to Unity.
            v2f vert (appdata v)
            {
                v2f o;
                o.vertex = UnityObjectToClipPos(v.vertex);
                o.uv = TRANSFORM_TEX(v.uv, _MainTex);
                UNITY_TRANSFER_FOG(o,o.vertex);
                o.color = v.color; // <----------------
                return o;
            }

            fixed4 frag (v2f i) : SV_Target
            {
                // sample the texture
                fixed4 col = tex2D(_MainTex, i.uv);
                // apply fog
                UNITY_APPLY_FOG(i.fogCoord, col);
                return col * i.color; // <----------------
            }
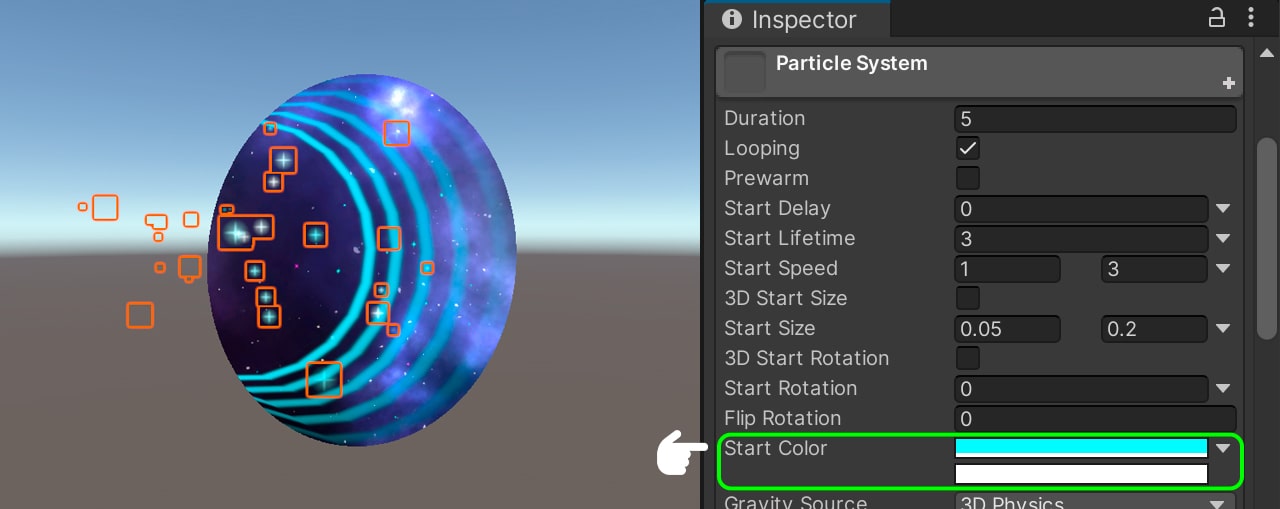
Now, we can change the color of our material using the particle system. We opt for Random Between Two Colors to introduce variety. The only remaining step is to add the glow layer.
Creating the Glow
Within our hierarchy, we create a new Quad as a child and name it ‘PortalGlow_mesh.’ We adjust its shape, positioning, and scale until the glow aligns with the mask.
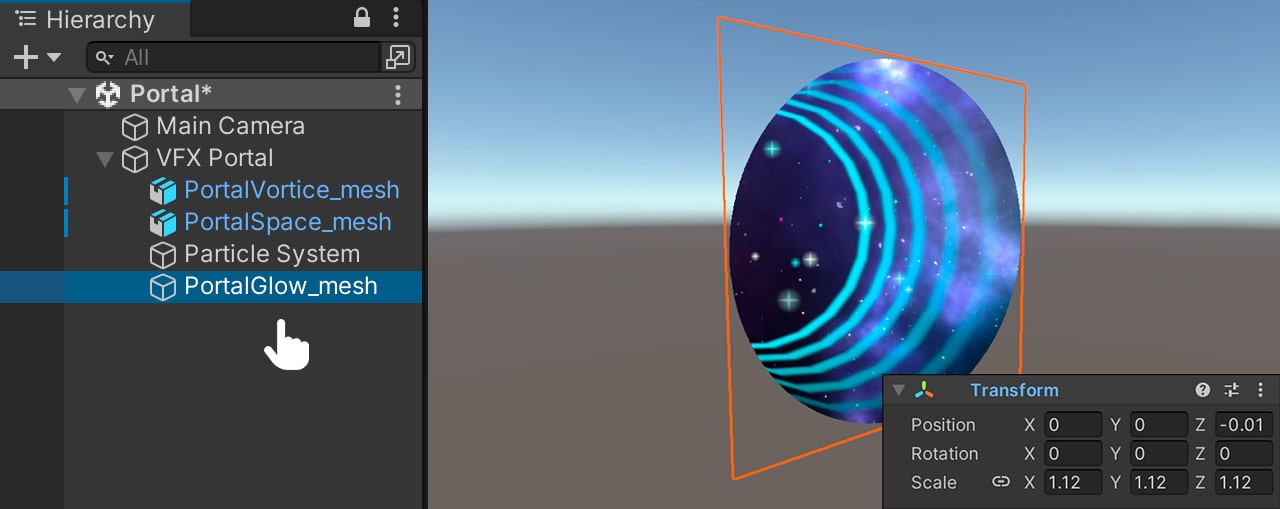
We open our ‘4_PortalGlow’ shader and include “Queue” = “Transparent + 4”. To disable the z-buffer, we add ZWrite Off. For an additive blending effect, we use Blend SrcAlpha One. After saving our changes, we return to Unity.
    SubShader
    {
        Tags { "RenderType"="Opaque" "Queue"="Transparent+4" } // <----------------
        ZWrite Off // <----------------
        Blend SrcAlpha One // <----------------
        LOD 100
We assign the ‘4_PortalGlow’ material to the Quad, using ‘PortalGlow_tex’ as the texture. As observed, our glow has been seamlessly added.
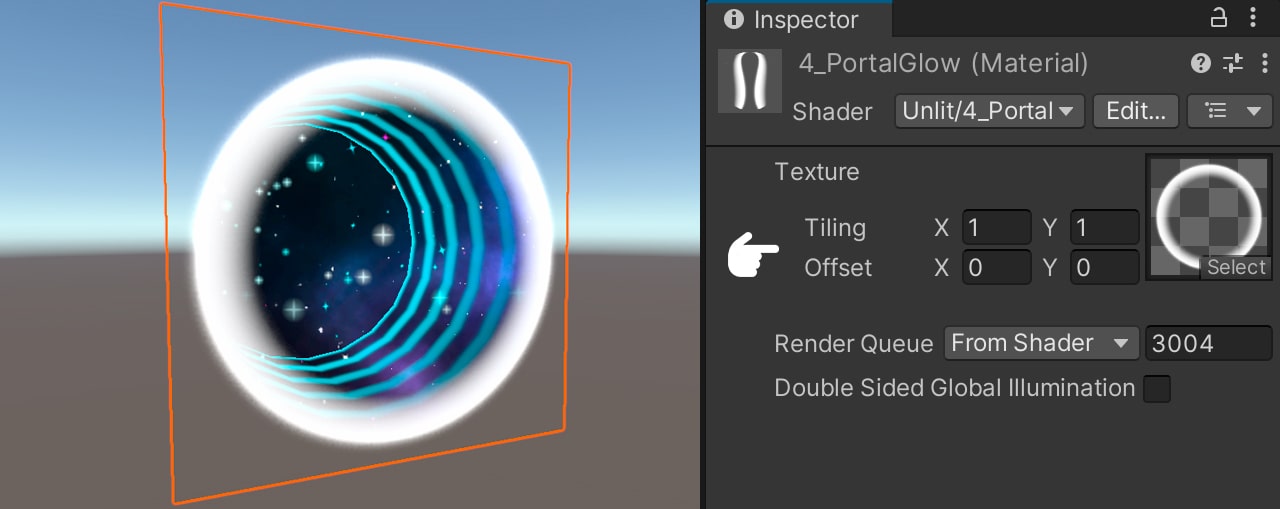
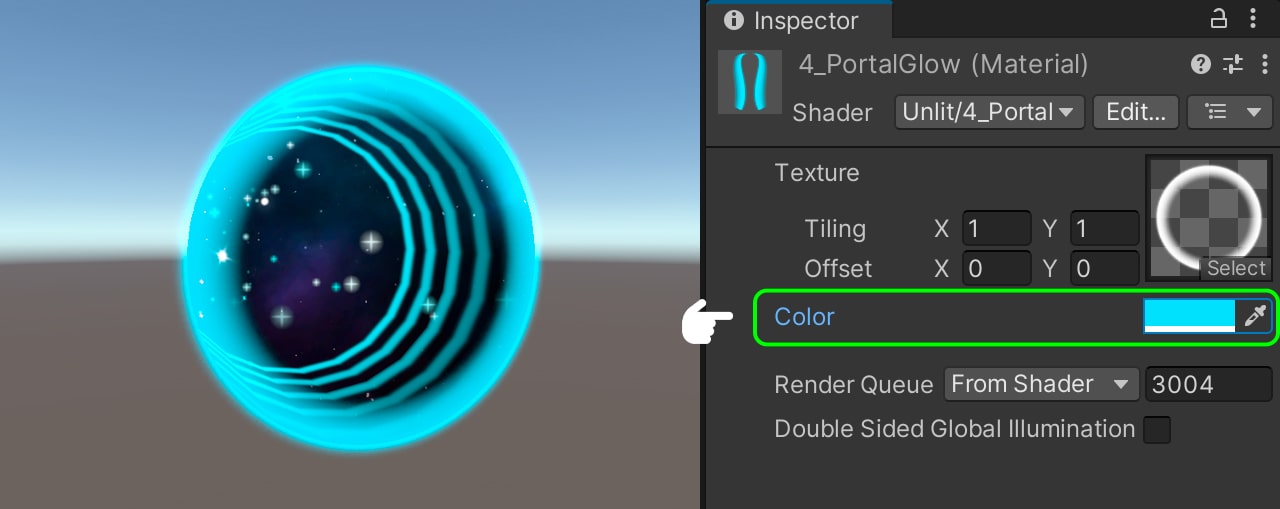
To enable color modification for the glow, we add the ‘_Color’ property, naming it ‘Color,’ which defaults to white. We establish the corresponding connection variable.
    Properties
    {
        _MainTex ("Texture", 2D) = "white" {}
        _Color ("Color", Color) = (0, 0, 0, 0) // <----------------
    }
sampler2D _MainTex;
float4 _MainTex_ST;
float4 _Color; // <----------------In the Fragment Shader, we multiply col by our color property. After saving our changes, we return to Unity.
            fixed4 frag (v2f i) : SV_Target
            {
                // sample the texture
                fixed4 col = tex2D(_MainTex, i.uv);
                // apply fog
                UNITY_APPLY_FOG(i.fogCoord, col);
                return col * _Color; // <----------------
            }
Now, we can freely change the color of our glow.
Final effect
Our space portal is now ready.
