Welcome to the exciting world of toon style! In this article, you’ll discover how to create fire with that same look in your game using Shader Graph in Unity. We’ll walk through the necessary steps to achieve this impressive visual effect and customize every detail to integrate into your toon world seamlessly. Get ready to bring life and energy to your projects with a vibrant and distinctive toon-style fire!
Project Structure
To organize our project, we are going to create a main folder called ‘Jettelly Fire Toon.’ Inside this folder, you can see all the subfolders used in the project (see image). The structure of the subfolders can be organized according to your preferences, but it is important to maintain order in any project.
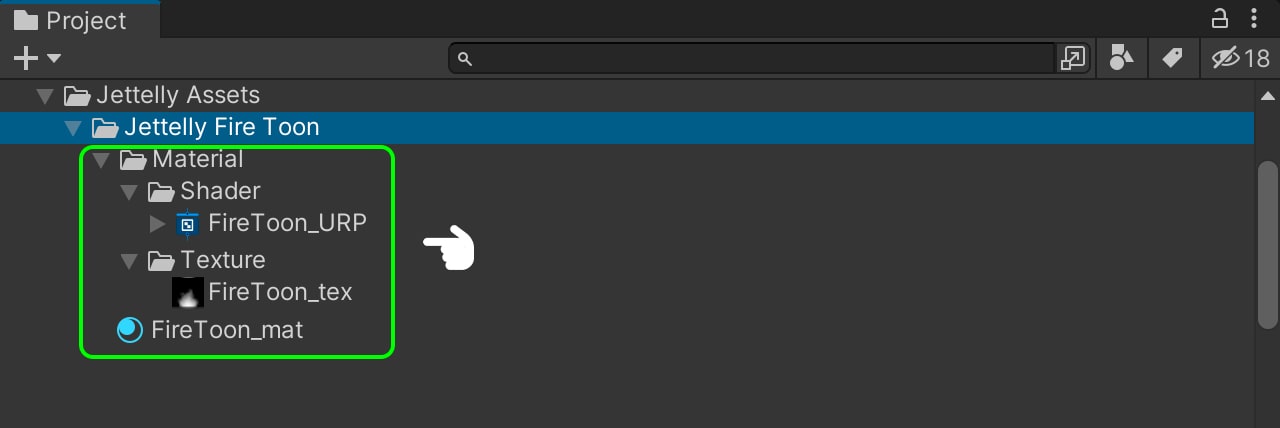
Shader & Material setting
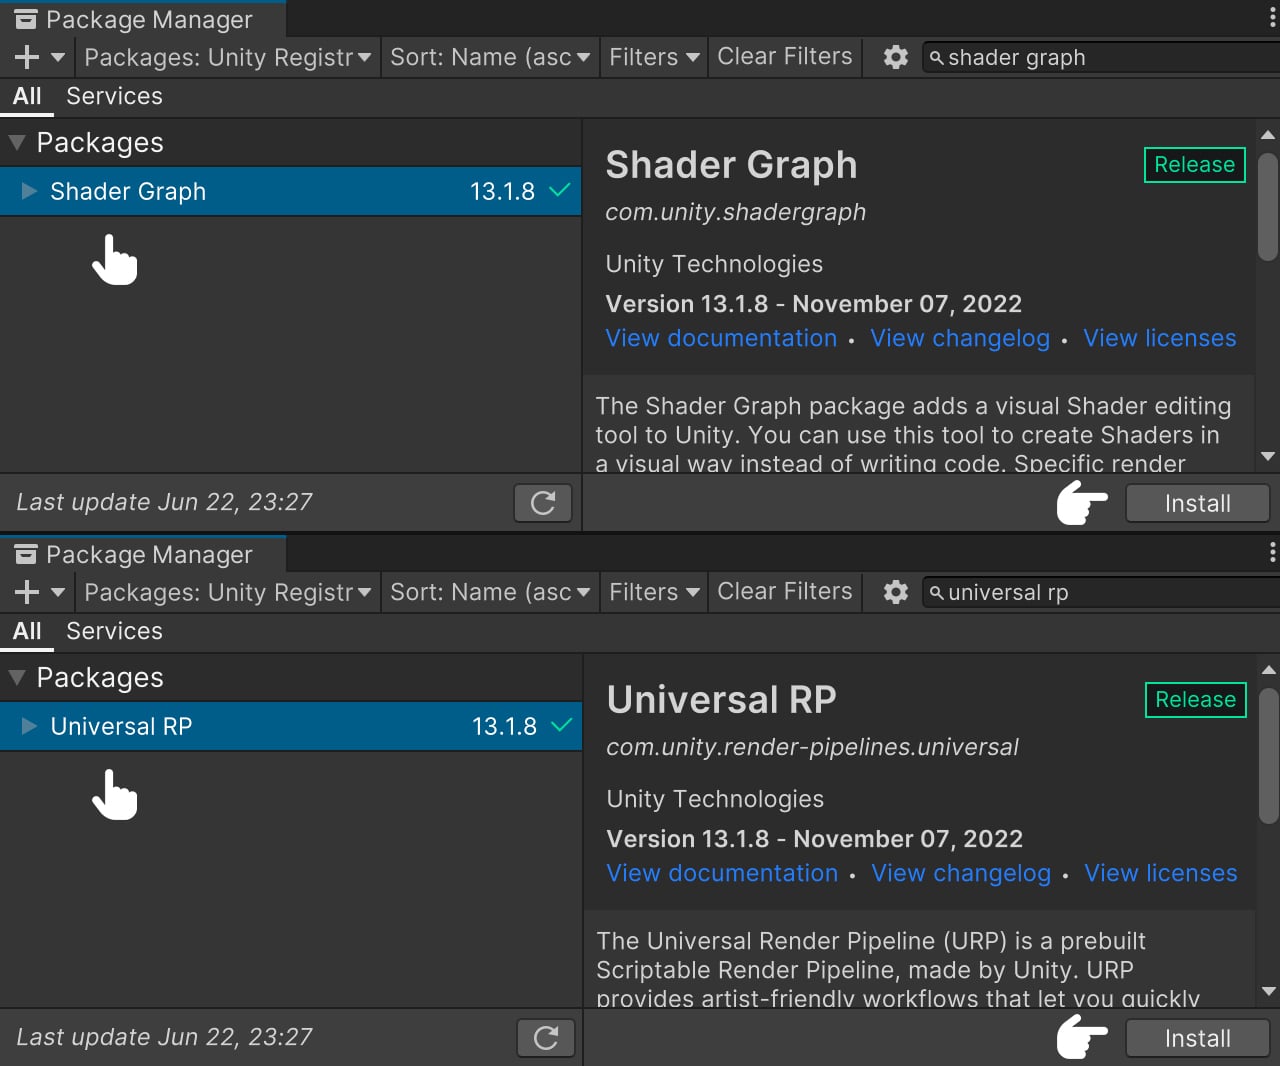
Before we get started, it is essential to install the necessary dependencies to ensure our shader functions properly: Shader Graph and Universal RP. Shader Graph enables us to program our shader using nodes, while Universal RP guarantees accurate display within our game. To install these dependencies, follow these steps: Go to Windows > Package Manager. In the opened window, search for both dependencies and proceed to install them.
To start, we need to search for Shader Graph and select the latest available version. After selecting the version, we can proceed with the installation. Next, we search for Universal RP and select the most recent version before proceeding with the installation as well. Once both installations are complete, we can safely close the window.
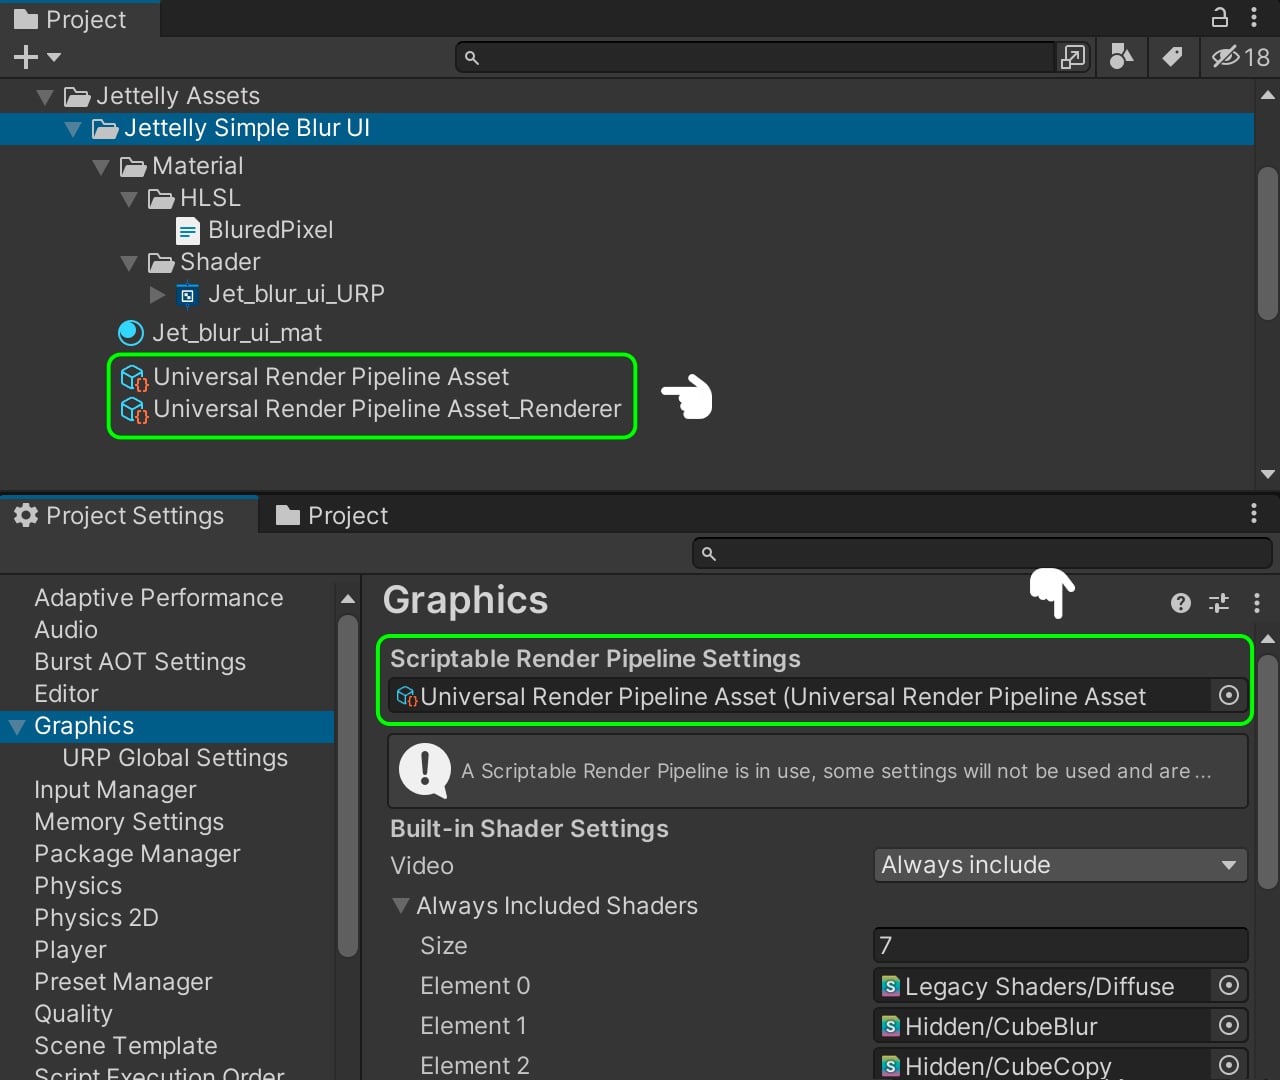
After successfully installing the required dependencies, we can proceed to create a new Render Pipeline for our project. To do this, follow these steps: Navigate to Create > Rendering > Universal Render Pipeline > Pipeline Asset (Forward Rendering). Afterward, go to Edit > Project Settings > Graphics and select the Scriptable Render Pipeline Setting. From there, we can choose the previously created Render Pipeline.
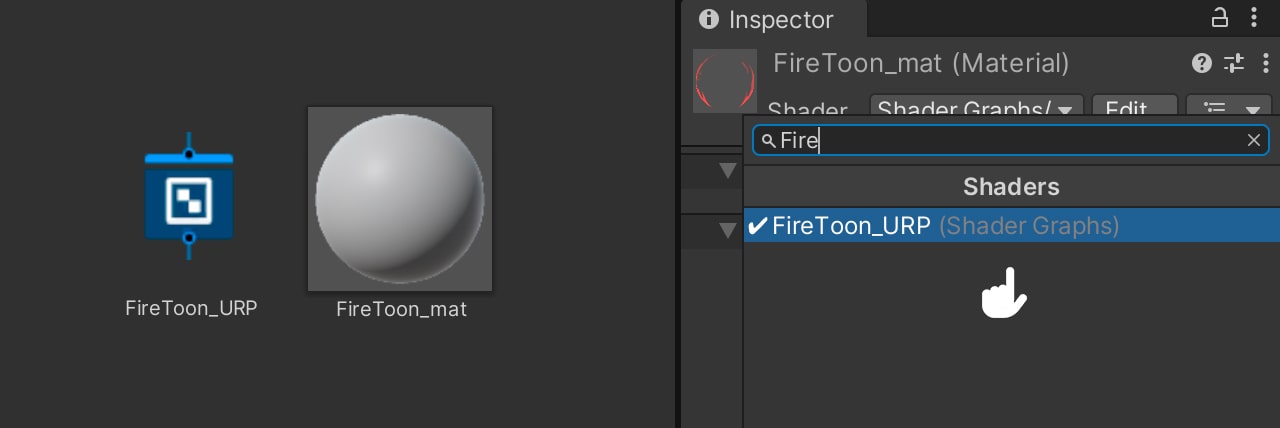
Next, we need to create our Shader and Material. To do this, we create an Unlit Graph shader by navigating to Create > Shader > Unlit Shader and naming it ‘FireToon_URP.’ Following that, we proceed to create a material by selecting Create > Material naming it ‘FireToon_mat’.
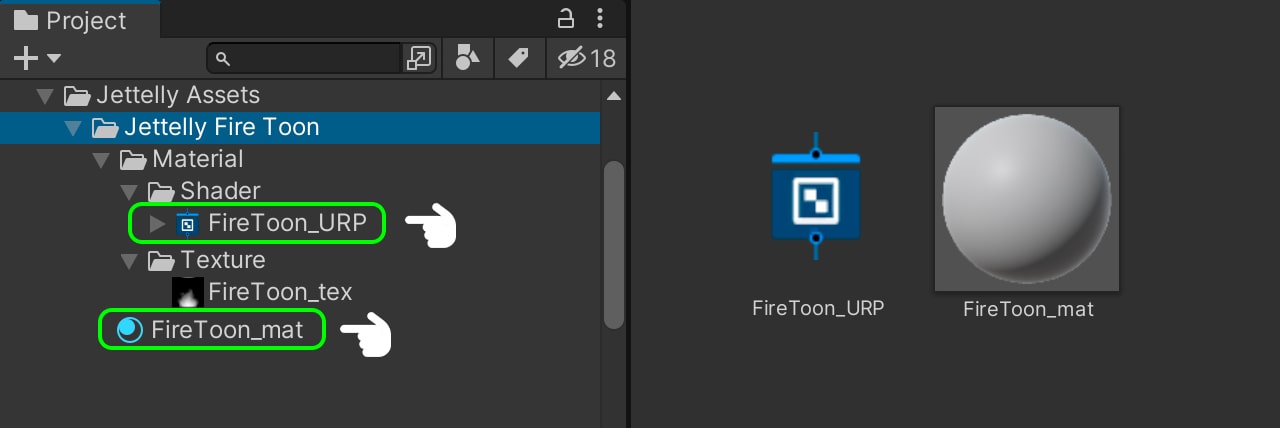
We assign the shader to the material from the Material Inspector.
Creating the scene
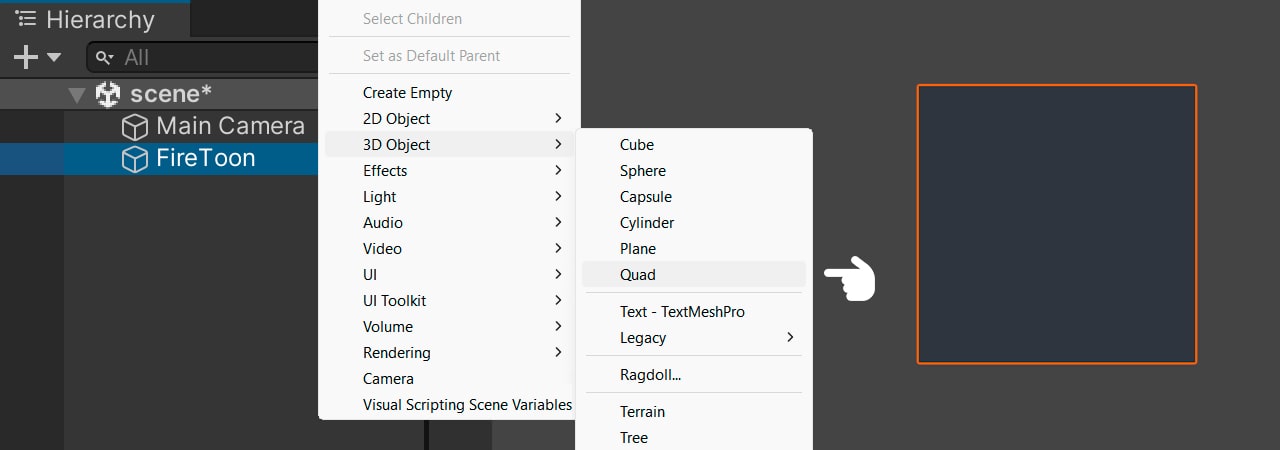
The next step is to create a Quad and name it ‘FireToon. ‘ Assign the ‘FireToon_mat’ Material to this object.
Creating the fire effect
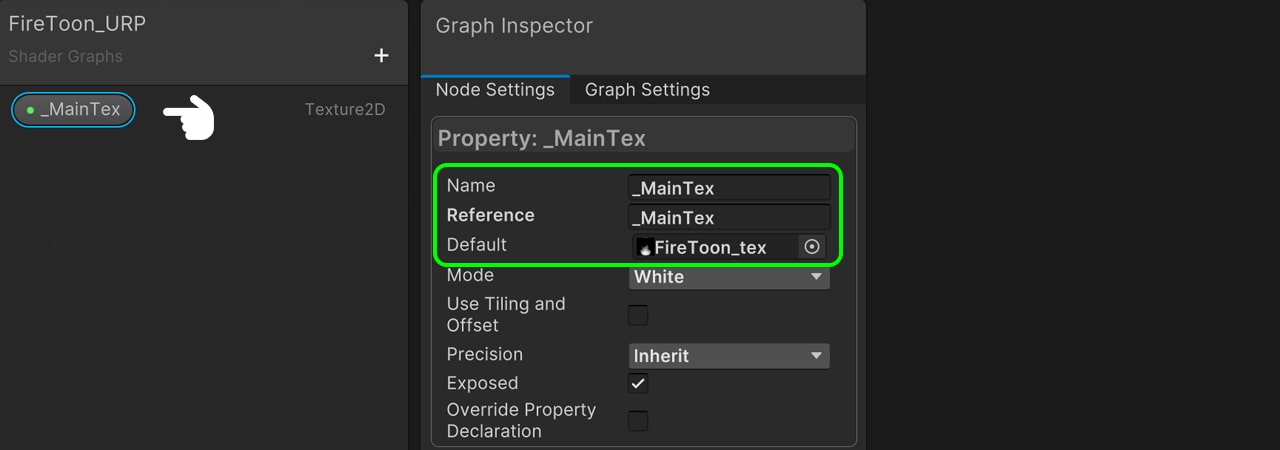
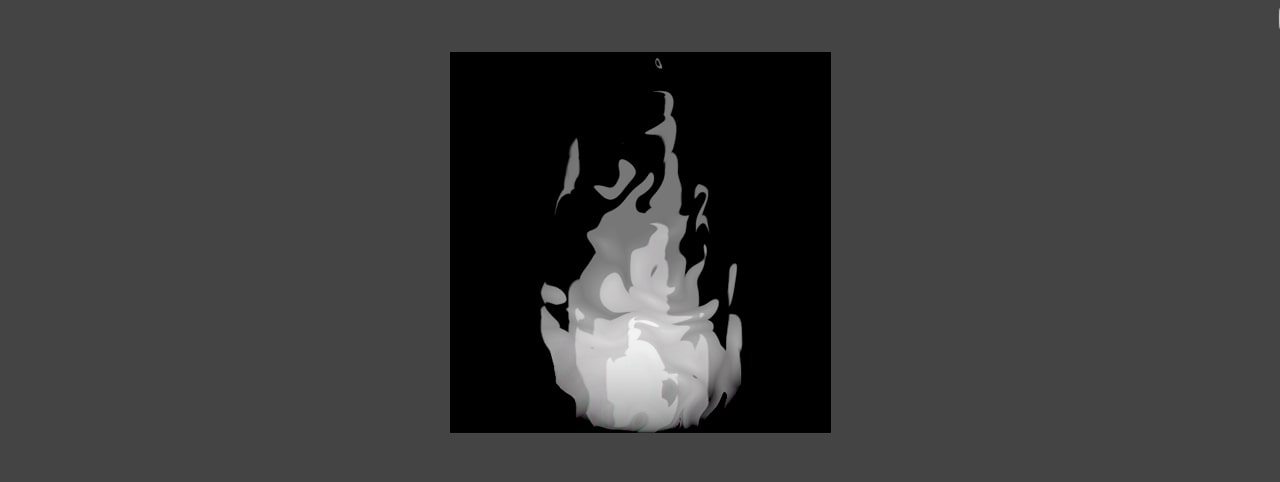
Now, open the shader. To create the fire effect, we’re going to distort the UV coordinates of the fire texture. To do this, create a 2D Texture in the Blackboard and name it ‘_MainTex.’ And we set the default texture ‘FireToon_tex.’
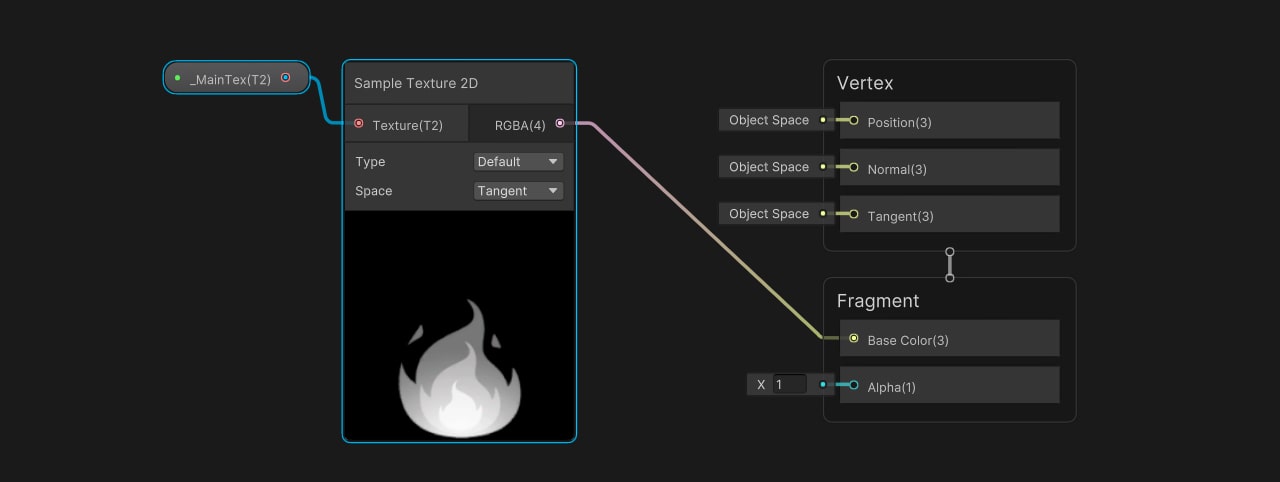
Drag the 2D texture into the node area and connect it to a Sampler Texture 2D node. Then, connect the RGBA output to the base color input in the Fragment Shader.
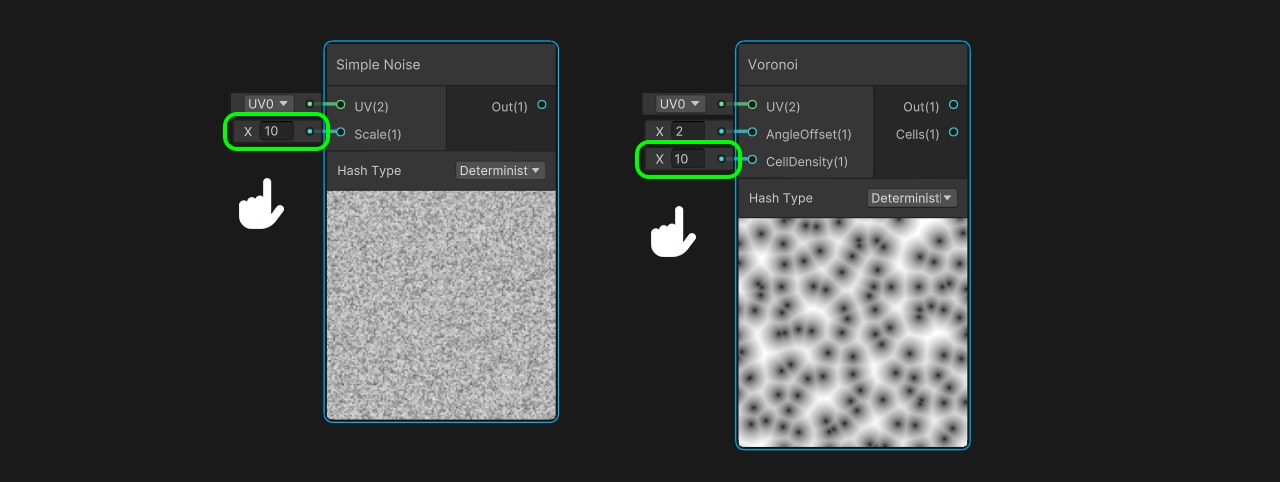
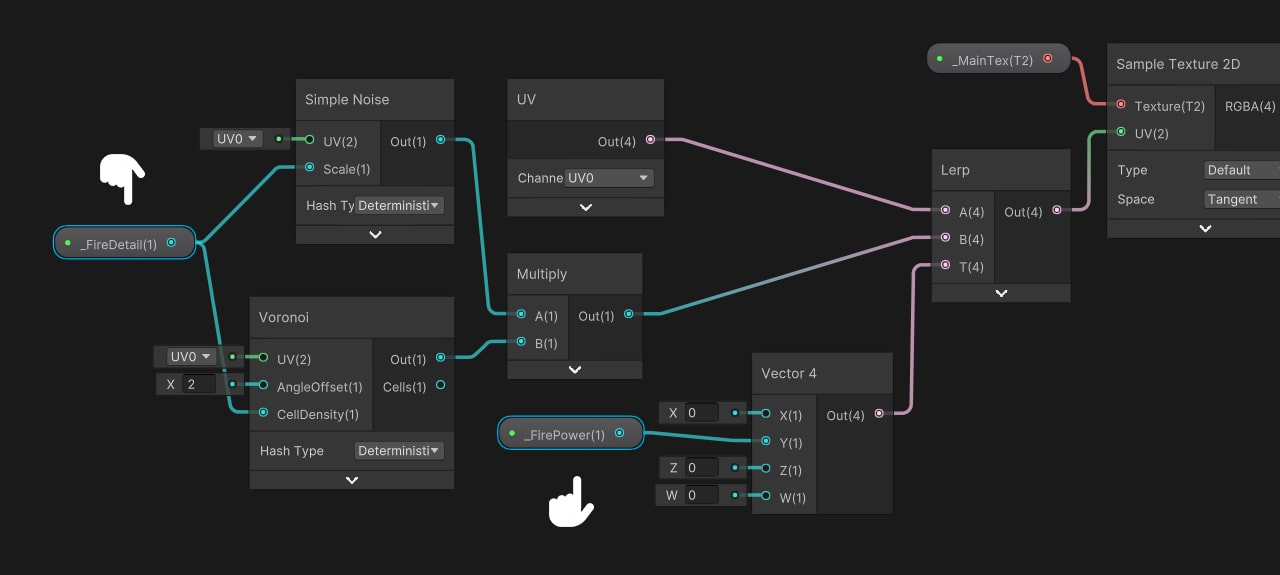
Next, we’re going to distort the UV coordinates of the texture. For this, use a Simple Noise node and a Voronoi node. Set the Scale and Cell Density to 10 in order to get details in the fire.
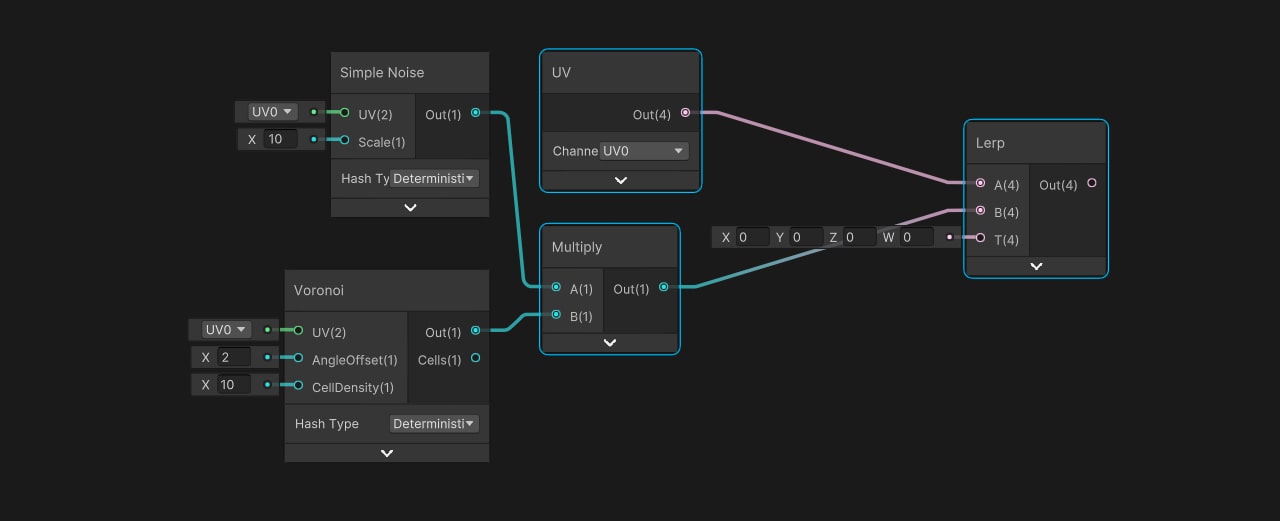
Multiply these two nodes to generate the necessary distortion. Then, add a UV node that we’ll use to interpolate between the mesh UV coordinates and the result of the previous operation. Add a Lerp node and connect the UV coordinates as the first input, and the result of the previous operation as the second input.
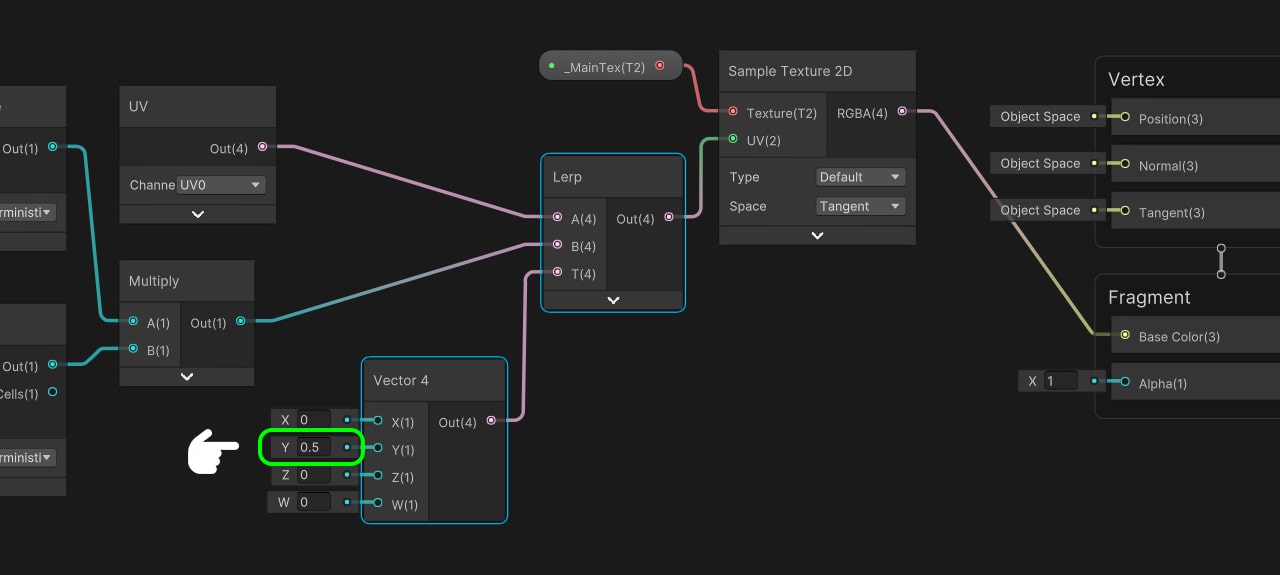
Since the fire moves from bottom to top, connect a Vector 4 to the Lerp node and set the Y value to 0.5. This will allow the distortion to be applied only to the V coordinate of the UV coordinates. Connect the output of the Lerp to the UV input of the texture. Save the shader and go back to Unity.
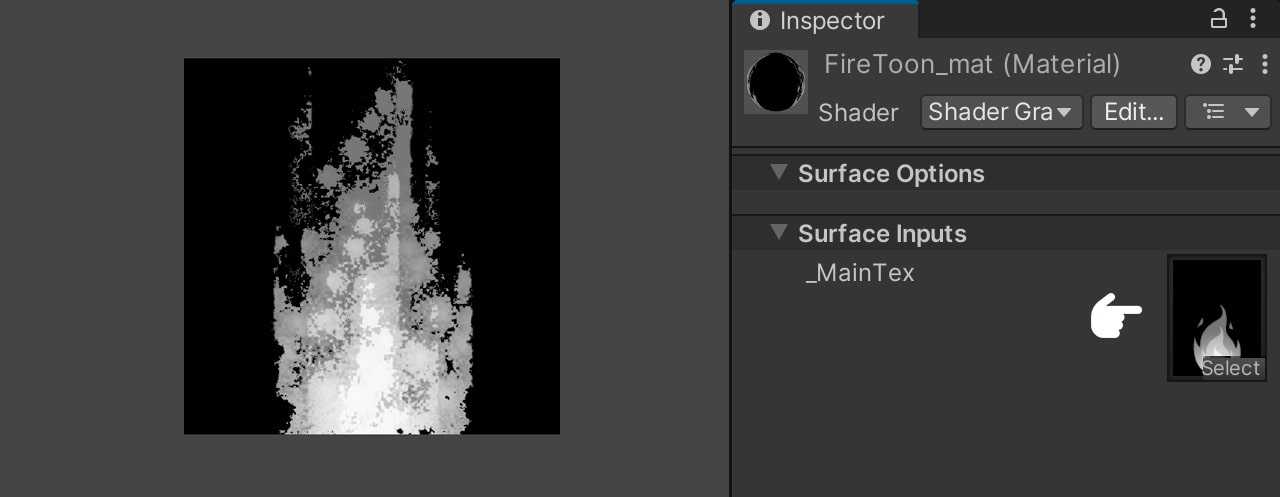
Now you can see how the texture is distorted based on the UV coordinate values.
Let’s go back to the shader. Before we continue, let’s add some properties to modify the distortion values dynamically.
Go to the Blackboard and create a Float called ‘_FireDetail.’ In the Graph Inspector, set this vector as a slider between 1 and 20, with 10 as the default value. We’ll use this vector to change the scale and density of both the Simple Noise and Voronoi nodes.
Create another Float called ‘_FirePower,’ which will be a Slider between 0 and 1, with 0.2 as the default value. We’ll use this vector to modify the value of the V coordinate in the Lerp.
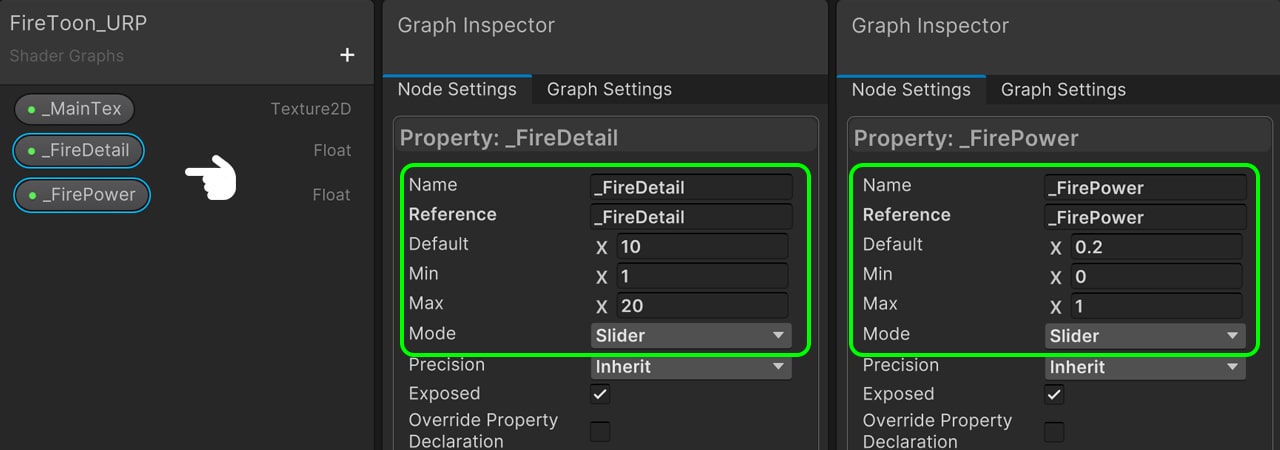
Drag these properties into the node area and connect ‘_FireDetail’ to the Scale and Density, and ‘_FirePower’ to the V coordinate of Vector 4. Now you can dynamically modify the values from the material. Save the shader and go back to Unity.
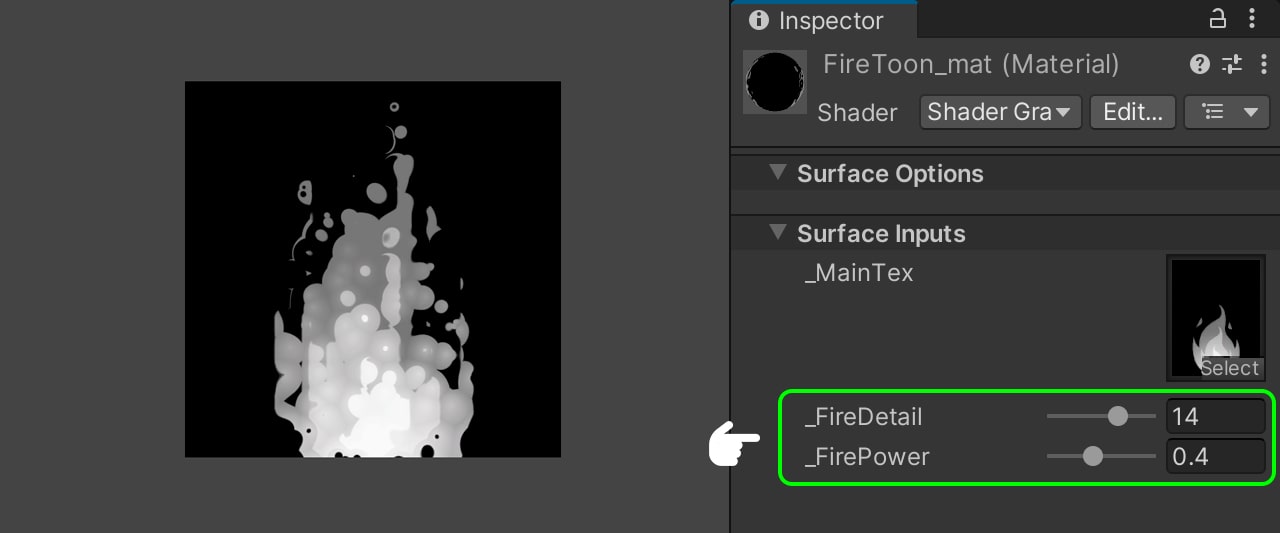
By modifying the values, you’ll see how the UV coordinates are distorted, directly affecting the texture you’re using.
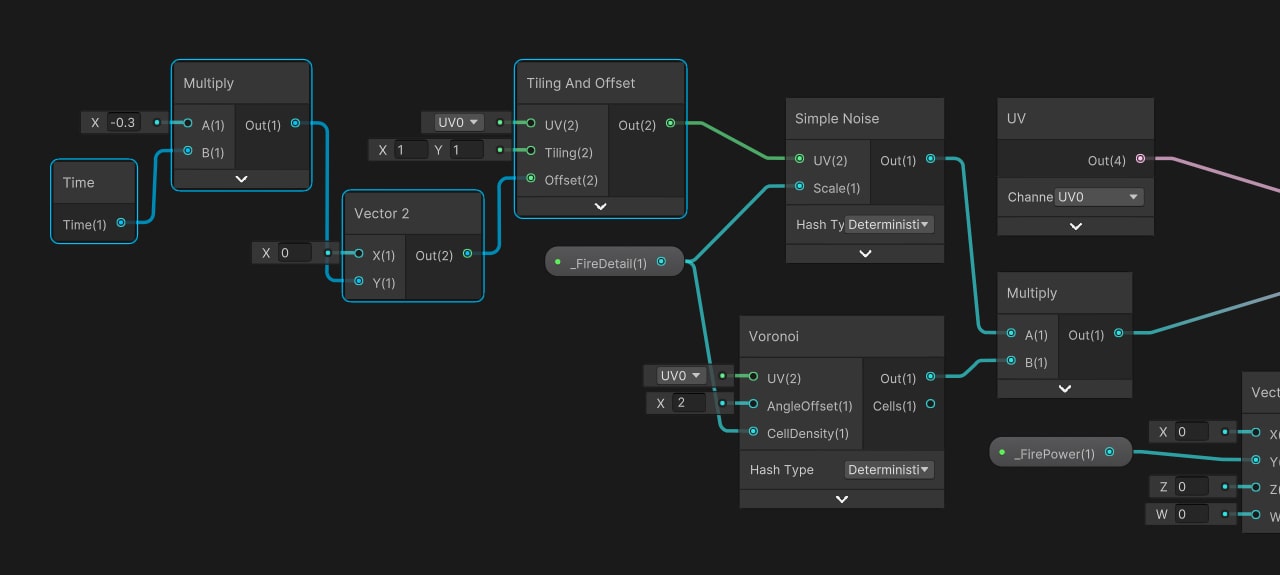
Go back to the shader once more. Now we’ll animate the UV coordinates of the Simple Noise and Voronoi nodes. In the case of the Voronoi node, we’ll not only add animation, but also distort its UV coordinates to achieve a fire-like behavior.
Let’s start with the Simple Noise. Add a Tiling and Offset node and connect it to the UV coordinates. In this node, we’ll animate only the offset in the V coordinate to make it move from bottom to top. To do this, add a Vector 2 and connect it to the Offset. Then, bring in a Time node and multiply it by -0.3 to get a slow speed and upward movement. Pass the result to the V coordinate of the UV coordinates. Save the Shader and go back to Unity.
Now you can see how the fire comes to life, but the behavior is not yet desirable. Let’s go back to the shader to adjust it.
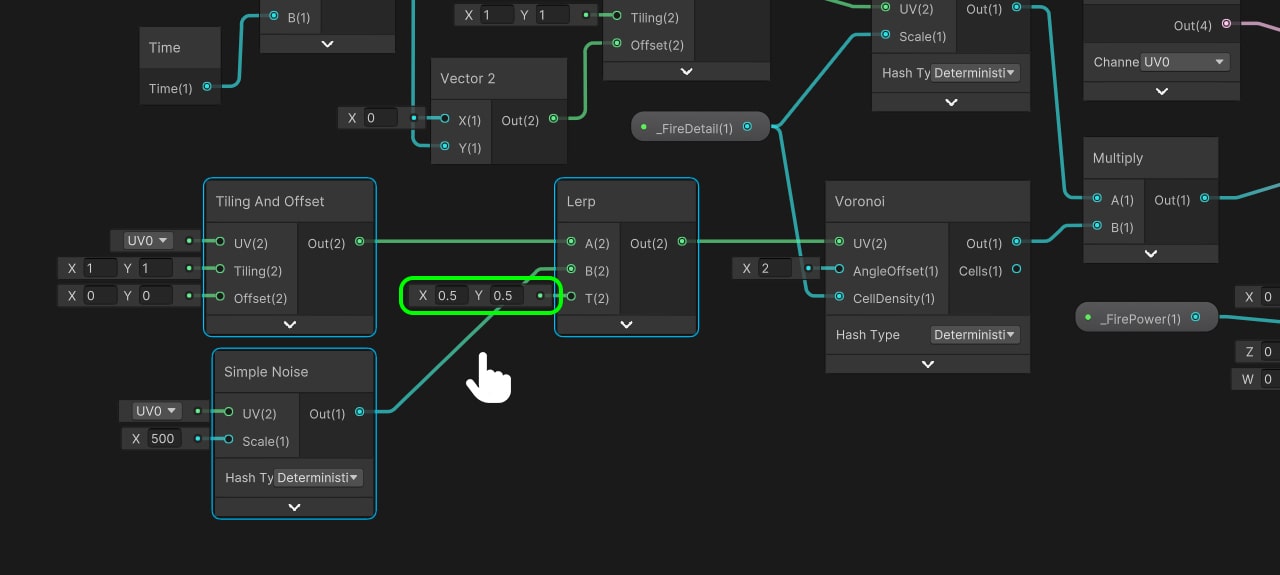
Now we’ll animate the coordinates of the Voronoi node, and before we do that, we’ll distort its UV coordinates to achieve a more realistic result. For this, add a Tiling and Offset node and a Simple Noise node. Create a Lerp between these two nodes and then connect them to the UV coordinates of the Voronoi node. In the T input of the Lerp node, set it to 0.5 for both X and Y to get a 50% interpolation between each node.
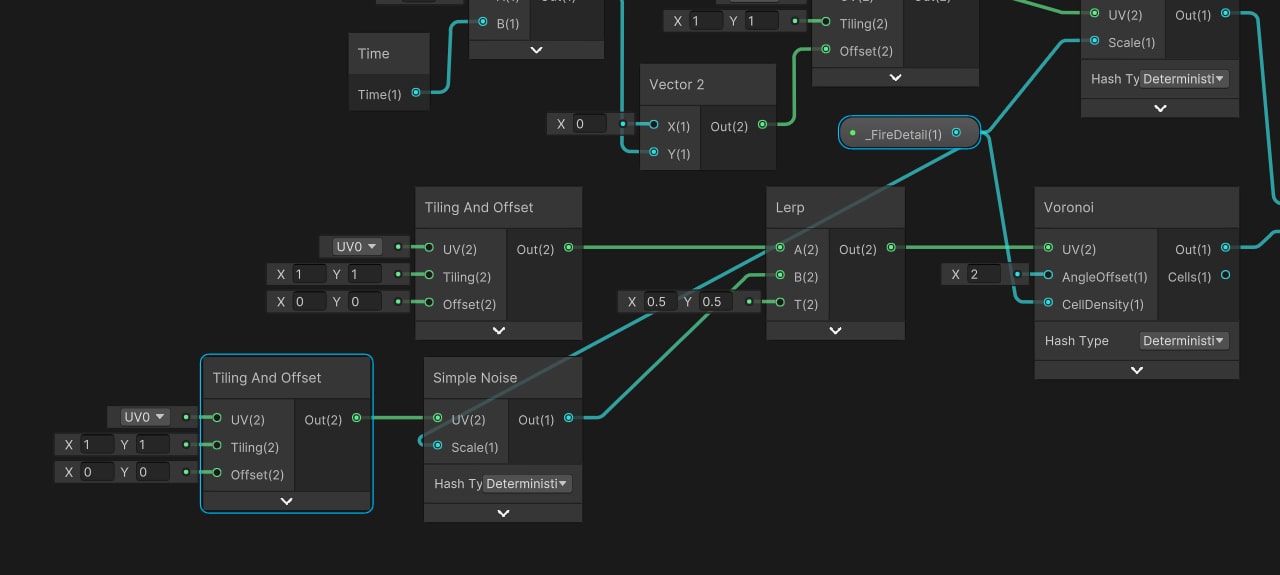
Connect the ‘_FireDetail’ property to the scale of the Simple Noise node to get an overall distortion value for the UV coordinates. Again, add a Tiling and Offset node and connect it to the UV input of the Simple Noise node to get more precise distortion.
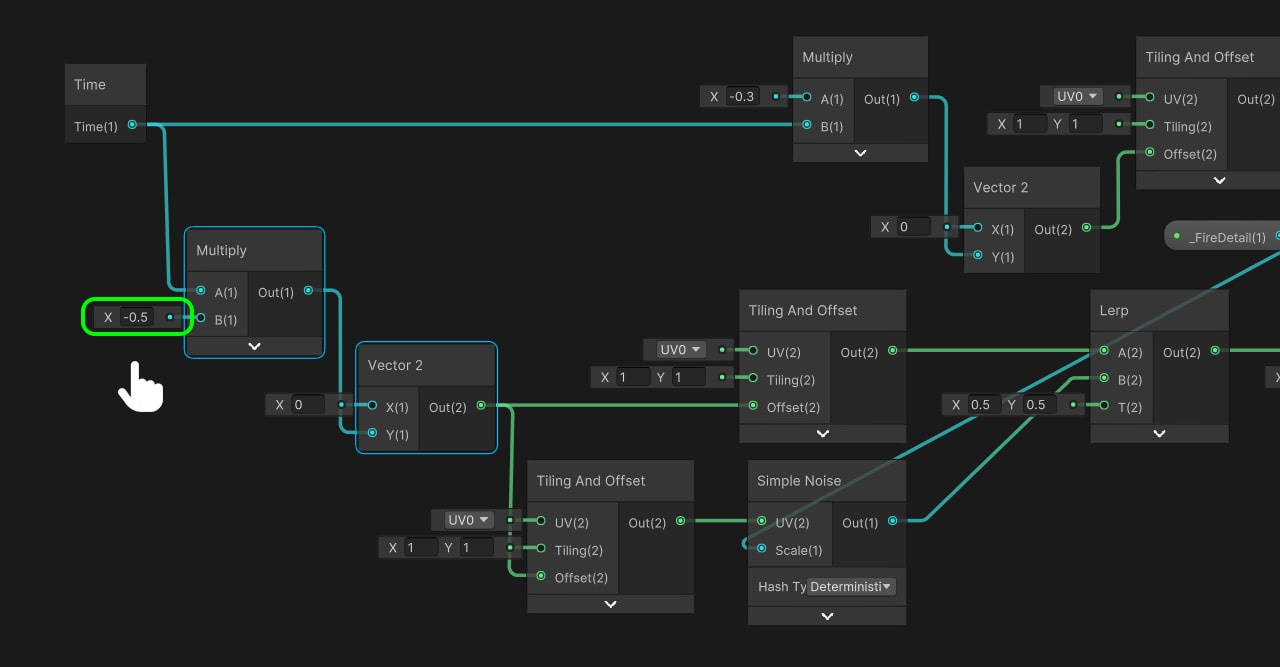
Now we’ll adjust the offset in both nodes of the Tiling and Offset to animate the V coordinate of the UV coordinates. To do this, add another Vector 2, connect it to both Offset inputs, and then multiply ‘_Time’ by a value less than -0.5 to create a difference in movement between the Simple Noise and Voronoi nodes. Save the shader and go back to Unity.
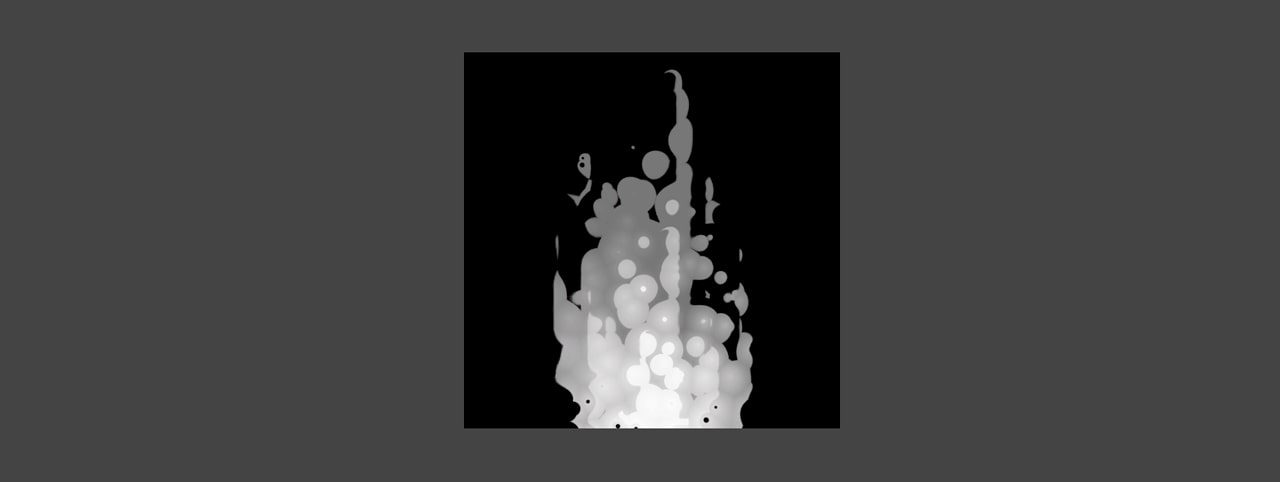
Now you can observe how the Voronoi node animates and the fire has a more realistic behavior. By modifying the properties, you can find a balance in the desired behavior. However, there’s currently a problem: when the fire is distorted too much, the bottom part of the texture goes beyond the Quad margin. Let’s fix this by returning to the shader.
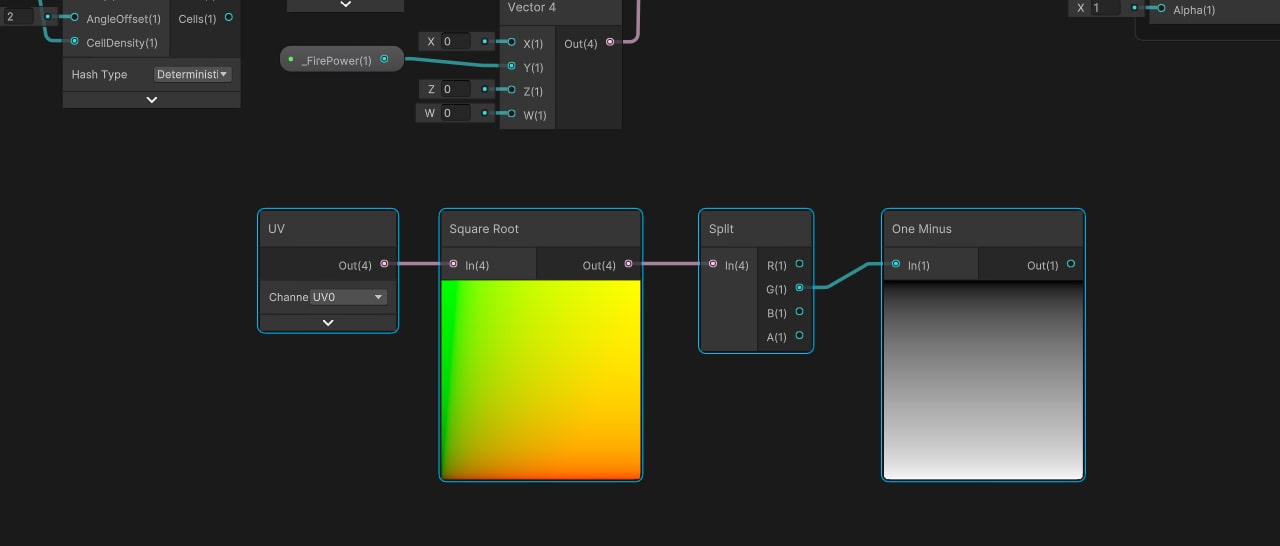
We’ll perform an operation to generate a margin at the bottom of the Quad. For this, add a UV node and connect it to the Square Root node. This way, you’ll get a much thinner gradient in the UV coordinates. Next, add a Split node and separate the coordinates since we’ll only use the V coordinate of the UV coordinates. Connect the V coordinate to the One Minus node to invert the color.
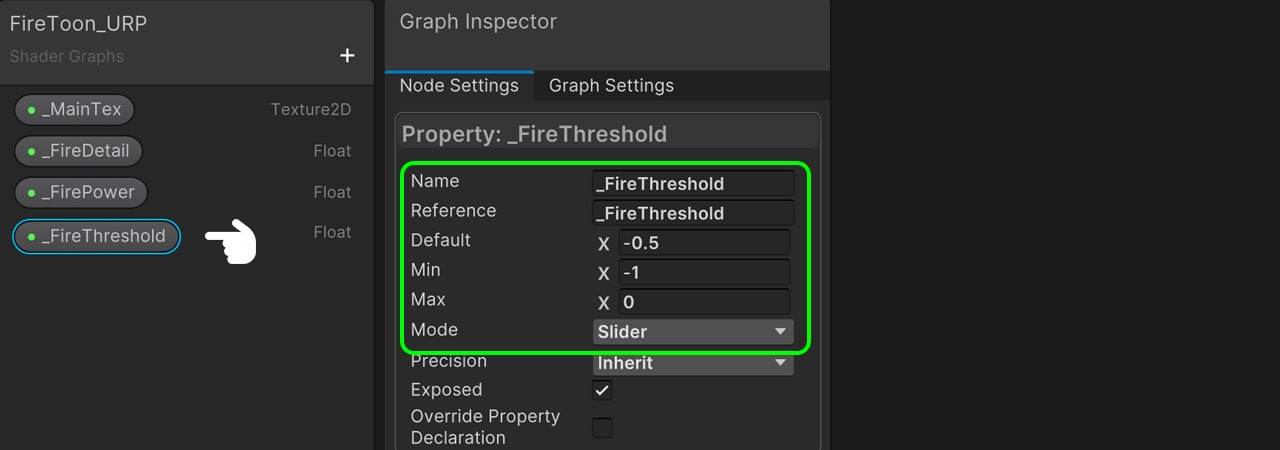
Next, we’ll add a threshold to modify the position of the V coordinate. Go to the Blackboard and add a new Float value called ‘_FireThreshold.’ Set it as a slider with values between -1 and 0, and -0.5 as the default value.
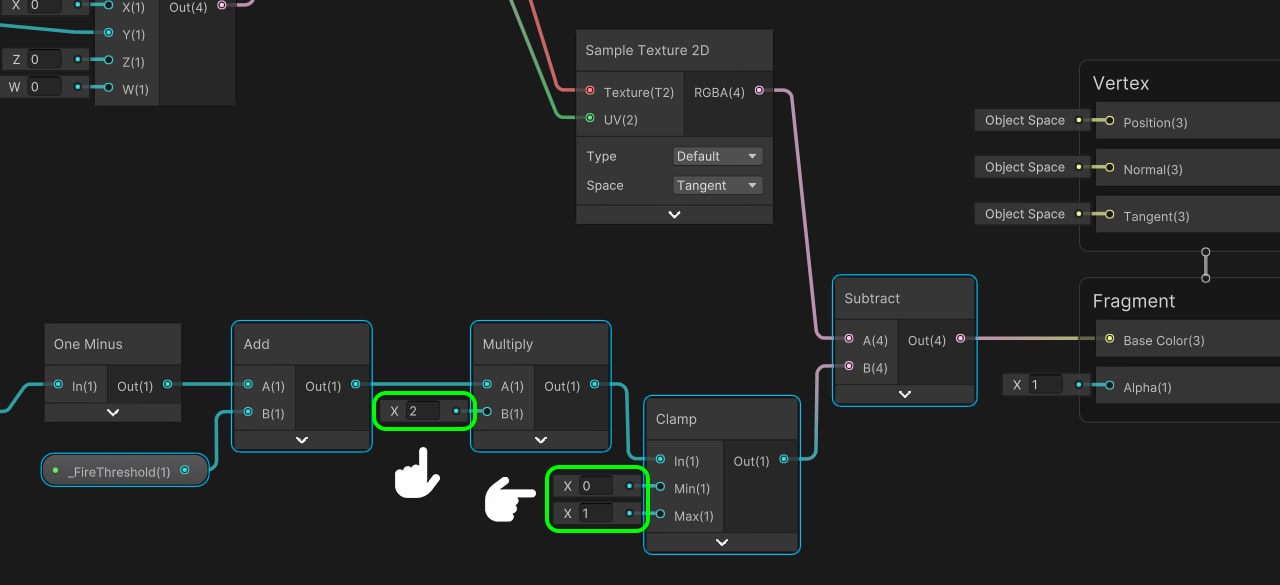
Add ‘_FireThreshold’ to the previous operation, then multiply it by 2 to increase its value, and pass this result through a Clamp node so that the effect applies only in the range of 0 to 1. Finally, subtract the result from the ‘_MainTex’ texture. Save the shader and go back to Unity.
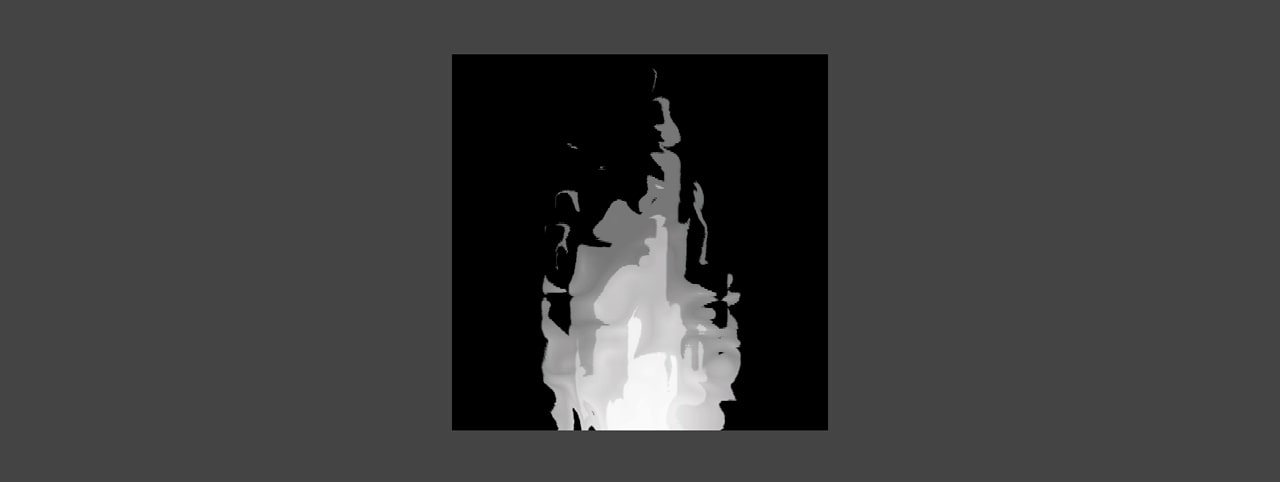
Now you can see how the bottom part of the effect darkens.
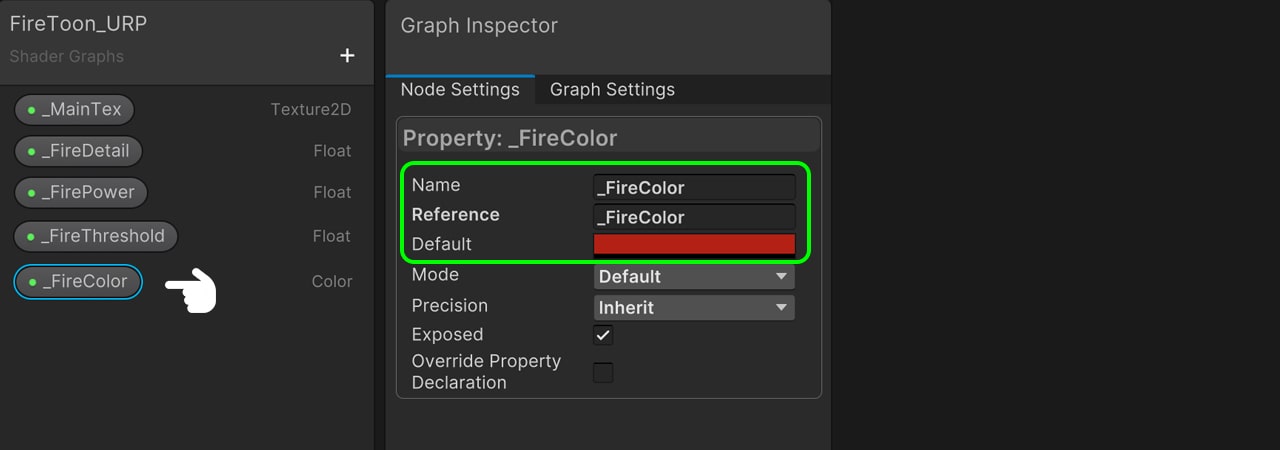
Lastly, let’s add color to the shader. In the Blackboard, add a new color property called ‘_FireColor’ and set the default value to orange.
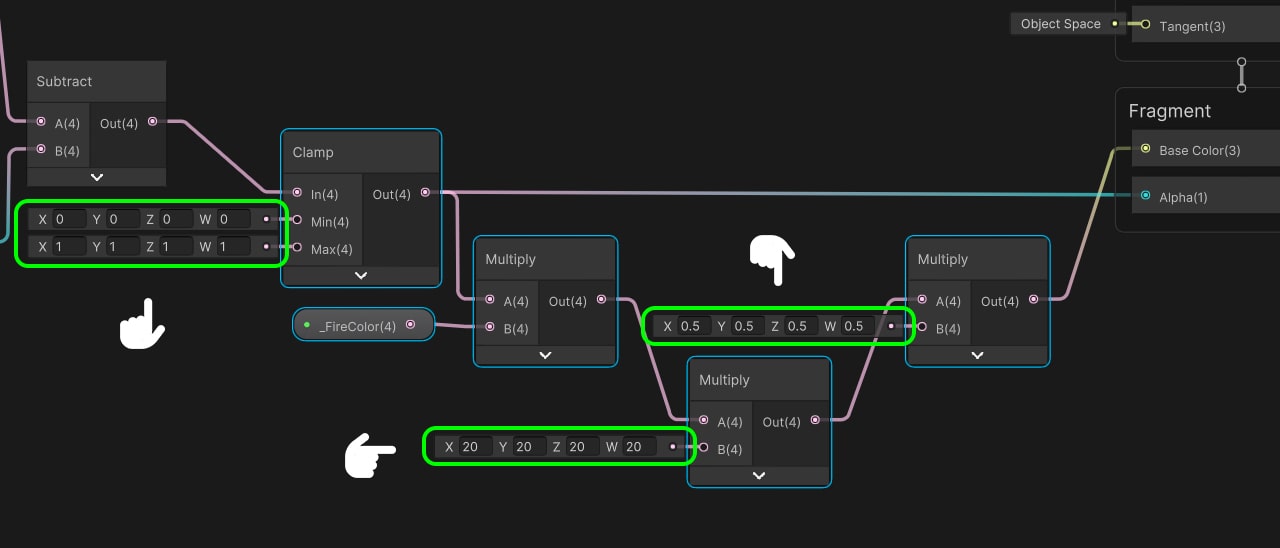
We’ll use a Clamp node again to ensure that the values remain in the range of 0 to 1. Drag the ‘_FireColor’ property to the node area and multiply the previous Clamp by this property. Then, multiply it again by 20 to increase the saturation of the effect, and finally multiply it by 0.5 to get a more realistic color. Connect this operation to the color input in the Fragment Shader. Also, connect the result of the Clamp node to the alpha channel.
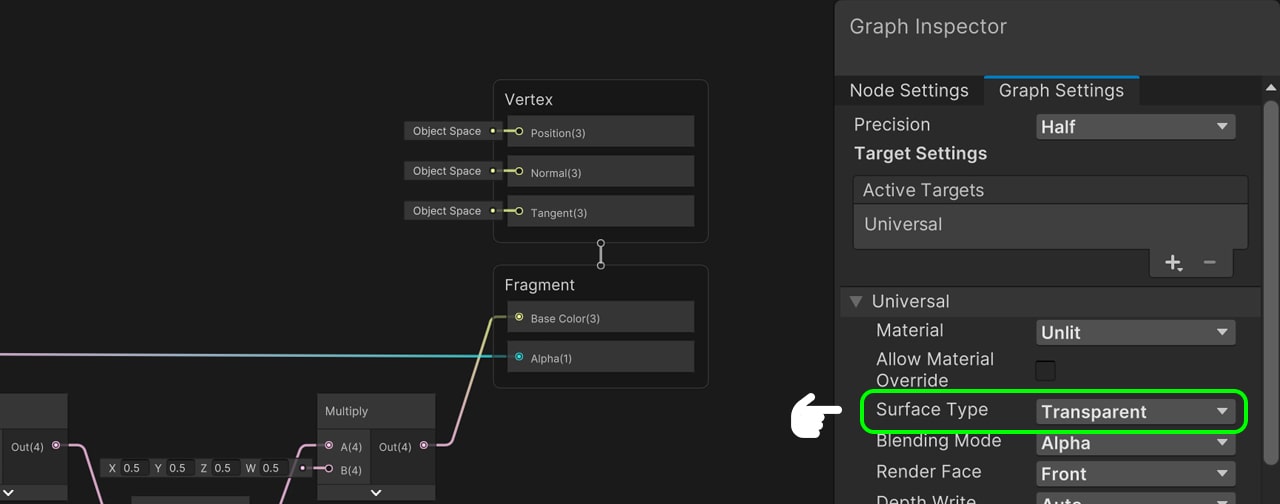
Finally, go to to the Graph Inspector and set the Surface Type to ‘Transparent.’ Save the shader and go back to Unity.
Final effect
Now you can see that our effect is working perfectly. The fire effect is ready.
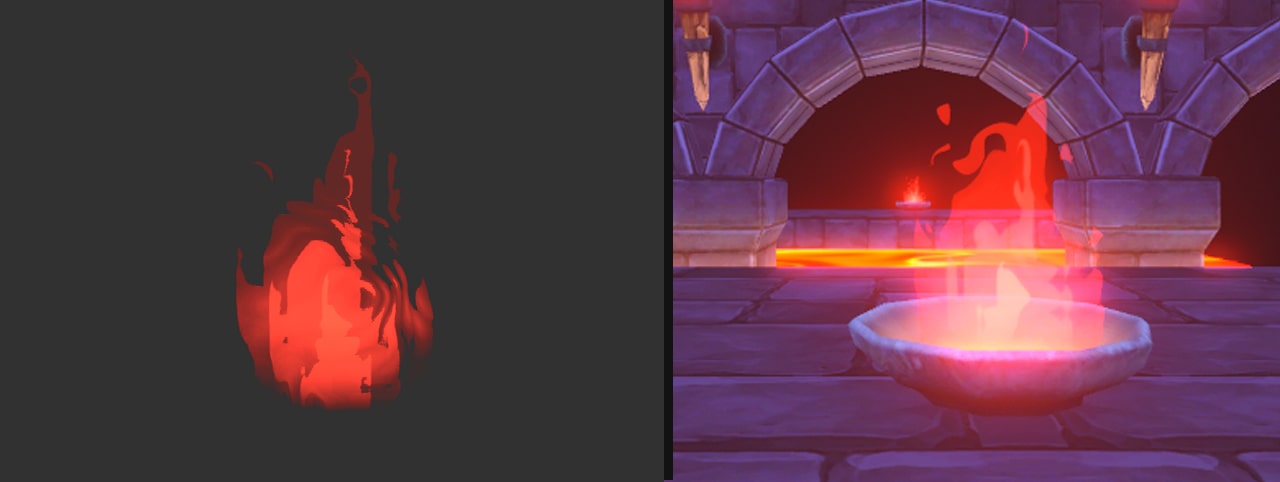
I invite you to modify the values and add a particle system for the fire sparks. Enjoy exploring and customizing your fire effect in Unity!

